The complete guide to acclimating your laminate flooring
Laminate flooring is a great (and cheaper) alternative to traditional hardwood floors. People using laminate often prefers to go the DIY route rather than pay a professional installer. However, one common mistake most DIYers make is installing the laminate floors without acclimatizing the laminate planks first.

Hey there, DIY enthusiasts! If you’re considering installing laminate flooring in your home, you’ve come to the right place. In this all-inclusive guide, we’ll dive deep into the world of laminate flooring acclimation. You’ll learn the ins and outs of why acclimation is crucial, the step-by-step process, factors that affect acclimation time, and how to recognize when your flooring is good to go. We’ll also uncover common mistakes that you should sidestep to ensure a flawless installation. So, let’s jump right in!
# The importance of laminate flooring acclimation
You might be wondering, “Why do I even need to acclimate my laminate flooring?” Well, laminate flooring, like any other type of flooring, needs some TLC before installation to guarantee its longevity and performance. Laminate is made up of multiple layers, including a high-density fiberboard core that can be sensitive to temperature and humidity fluctuations. Acclimating your flooring properly helps to:
- Avert gaps, warping, or buckling caused by expansion and contraction.
- Ensure a smooth, even surface for installation.
- Preserve the manufacturer’s warranty and dodge potential disputes.
Now that you know why acclimation is essential, let’s explore the process itself.
# The nitty-gritty of acclimation: A step-by-step guide
- Check the Manufacturer’s Recommendations: Before anything else, consult the manufacturer’s guidelines for specific acclimation requirements. They’ll provide you with the best advice since requirements may vary depending on the product. Most manufacturers recommend an acclimation period of 48 to 72 hours.
- Prepare the Installation Space: Create a welcoming environment for your flooring by ensuring the installation area is clean, dry, and within the recommended temperature and humidity range. In general, this means maintaining a temperature between 60°F and 80°F and a relative humidity of 35% to 65%.
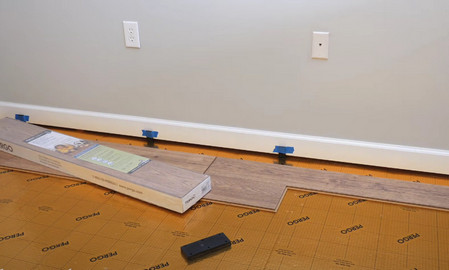
- Store the Laminate Flooring: Treat your flooring like royalty by stacking the unopened boxes horizontally, allowing for proper air circulation around each box. Be cautious not to stack the boxes too high, as this could lead to damage or instability.
- Monitor Temperature and Humidity: Keep a watchful eye on the temperature and humidity levels during the acclimation period using a hygrometer or thermostat. Make sure they stay within the recommended range.
- Assess the Flooring: After patiently waiting for the acclimation period to pass, it’s time to examine the flooring for any signs of warping, cupping, or damage. If everything looks shipshape, you can proceed with the installation.
# Factors that can throw a wrench in your acclimation time
As with any home improvement project, there are several factors that can influence the required acclimation time for your laminate flooring:
- Room conditions: If your space experiences extreme temperature or humidity fluctuations, you might need to extend the acclimation period.
- Flooring thickness: Thicker laminate flooring could take longer to acclimate.
- Geographic location: If you live in an area with high humidity or extreme temperature variations, brace yourself for a potentially longer acclimation process.
# Signs your laminate flooring is acclimated and ready to roll
To make sure your laminate flooring is ready for installation, keep an eye out for these indicators:
- Stable temperature and humidity: The installation area should maintain consistent temperature and humidity levels throughout the acclimation period.
- No signs of warping or cupping: Upon inspection, the flooring should be free of warping, cupping, or damage. If the planks look good, they’re likely acclimated and ready to go.
- No visible gaps or buckling: When you lay out the planks for a test fit, properly acclimated flooring shouldn’t exhibit any gaps or buckling between them.
# Common blunders to dodge
To ensure your laminate flooring acclimation is a walk in the park, be mindful of these pitfalls:
- Ignoring manufacturer’s guidelines: Don’t play the guessing game. Always follow the manufacturer’s recommendations for acclimation, as they’re tailored to your specific product.
- Cutting corners on acclimation time: Patience is a virtue. Rushing the acclimation process can lead to long-term issues with your flooring.
- Improper storage: Store the laminate flooring boxes horizontally with adequate air circulation to facilitate proper acclimation.
- Skipping temperature and humidity checks: Keep tabs on the temperature and humidity levels during the acclimation period to ensure they remain within the recommended range.
# Frequently asked questions
- Can I install laminate flooring without acclimating it first? We strongly advise against skipping the acclimation process. Failing to acclimate your flooring can result in gaps, buckling, and warping, which can negatively impact the look, performance, and longevity of your laminate flooring.
- Can I speed up the acclimation process? While it may be tempting to try and speed up the process, it’s best to let your flooring acclimate according to the manufacturer’s guidelines. Trying to rush the process could lead to problems down the line.
- How can I tell if my laminate flooring is acclimated properly? You’ll know your laminate flooring is acclimated when the temperature and humidity levels are consistent, the planks are free of warping or cupping, and there are no visible gaps or buckling during a test fit.
# Putting it all together
Acclimating your laminate flooring is a critical step in ensuring its longevity and performance. By following the manufacturer’s guidelines, preparing the installation space, monitoring temperature and humidity levels, and avoiding common mistakes, you can help your laminate flooring acclimate successfully and be ready for a seamless installation.