Ultimate Guide To Installing Vinyl Flooring: Step-By-Step Instructions
Join thousands of homeowners who’ve upgraded their homes by installing vinyl flooring. Our detailed guide makes it quick and easy, even for beginners. Start your DIY journey and see the transformation!

Are you considering installing vinyl flooring in your home or business?
It can be a great way to improve the look and feel of a room, but the installation process can be overwhelming.
With the right knowledge and preparation, you can make the process much easier.
In this ultimate guide to installing vinyl flooring, you’ll learn how to prepare for, and complete, the installation process.
We’ll go through the step-by-step instructions, as well as any special cases you should be aware of. You’ll have the information you need to make the installation process as simple and successful as possible.
So let’s get started on your vinyl flooring installation journey!
Key Takeaways
- Properly preparing the subfloor and installing a moisture barrier are important steps for vinyl flooring installation.
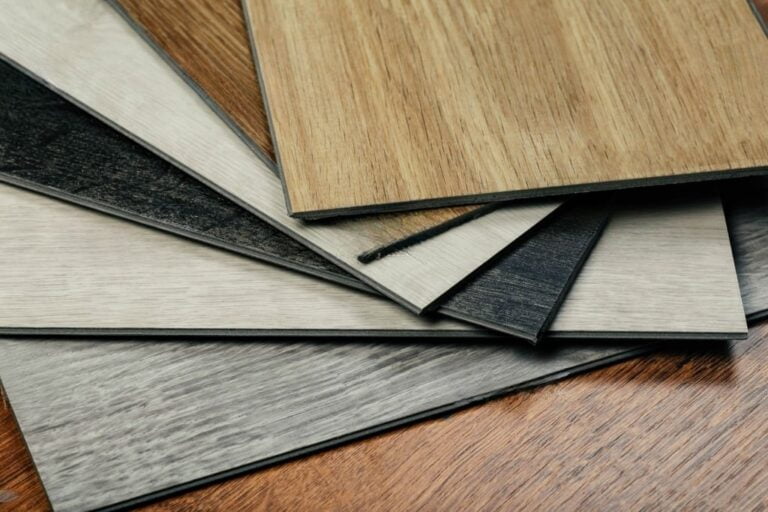
- There are various types of vinyl flooring, including floating, interlocking, marine, outdoor, and stair-specific vinyl flooring.
- Steps for vinyl flooring installation include sanding and measuring, cutting vinyl planks, connecting planks using tongue-and-groove system or adhesive, and filling gaps in seams.
- Vinyl flooring is a cost-effective option for upgrading the look of a space, and it is high-traffic tolerant and water-resistant. It is important to follow the manufacturer’s specific guidelines and instructions for special cases.
Preparing for Vinyl Flooring Installation
You’re looking to install vinyl flooring, so you need to be prepared with the right tools and steps.
Before you start, you’ll need to make sure that the subfloor is ready, whether it’s concrete, stairs, or plywood.
Additionally, you’ll need to install a moisture barrier underneath the vinyl flooring for optimal results.
With the right preparation and tools, you’ll be ready to begin your vinyl flooring installation project.
Tools needed for vinyl flooring installation
Before you begin installing your vinyl flooring, it’s important to make sure you have all the right tools. You’ll need a few basic items that are easy to find and easy to use. These include:
- A utility knife: This will be used to cut the vinyl flooring to the exact size and shape you need.
- A notched trowel: This is used to spread adhesive for the vinyl flooring.
- A floor roller: This is used to apply pressure to the vinyl flooring to ensure it is properly secured to the floor.
- A measuring tape: This will be used to measure the area where the vinyl flooring will be installed to ensure the right fit.
Having the right tools on hand will make the job of installing vinyl flooring go much more smoothly. With the proper tools, you can ensure that your vinyl flooring is installed correctly and will last for years to come.
Preparing the subfloor (concrete, stairs, plywood, etc.)
No matter what type of subfloor you’re working with, it’s important to prepare it correctly before installing vinyl flooring to ensure a long-lasting, professional finish.
For wood subfloors, this means ensuring that the floor is level and clean, and that the seams are properly sealed.
For concrete subfloors, it’s important to ensure that the surface is level, clean, and that any cracks have been repaired. Depending on the type of subfloor, you may also need to create an expansion gap between the wall and the flooring. This helps to prevent buckling and warping of the vinyl flooring as the temperature changes.
It’s also important to ensure the subfloor is completely dry before installing the vinyl floor, as moisture can cause the planks to warp and mold.
Taking the time to properly prepare the subfloor will not only ensure a professional finish, but also a durable, long-lasting vinyl floor.
Installing a moisture barrier under vinyl flooring
Installing a moisture barrier beneath vinyl flooring is a critical step in ensuring a long-lasting, professional finish. Luxury vinyl planks are particularly vulnerable to moisture damage, so it’s important to take the necessary steps to protect the flooring.
Here are a few important steps to take when installing a moisture barrier:
- Measure the area and make sure the necessary materials are available, including luxury vinyl planks, vinyl adhesive, and a floor-leveling compound.
- Place the barrier on the subfloor in a manner that’s consistent with the manufacturer’s instructions.
- Seal the edges of the barrier with the adhesive to ensure that no moisture can seep in.
Taking the time to install a moisture barrier beneath your vinyl flooring is well worth it. Not only will it protect your flooring from moisture, but it can also help to make it look professional and luxurious.
Step-by-Step Guide to Installing Vinyl Flooring
Now, we’ll discuss the step-by-step guide to installing vinyl flooring. We’ll cover the different types of vinyl flooring, such as floating, interlocking, marine, outdoor, and stair-specific installations.
We’ll discuss the methods for each type of installation, so you can be sure to choose the best one for your project. We’ll also provide tips on how to install it correctly, so your vinyl flooring will last longer.
How to install floating vinyl flooring?
Achieve a beautiful, professional-looking finished product with this complete step-by-step guide to installing floating vinyl flooring! Installing a floating vinyl floor is a great way to give any room in your home a luxurious, modern look.
Floating vinyl flooring, also known as Luxury Vinyl Plank Flooring, is easy to install, and requires minimal tools. Follow this guide to ensure you have a successful installation of Vinyl Plank:
- Prepare the floor. This includes cleaning the area, removing any old flooring, and leveling the subfloor.
- Measure the area and calculate the amount of vinyl planks you’ll need to purchase.
- Begin with the tongue edge of the first plank, and lay it down along the wall.
- Tap the planks together using a tapping block and hammer. This will ensure a tight fit between the planks.
With these steps, you can install floating vinyl flooring and give any room in your home a modern, luxurious look. Be sure to follow the steps carefully to ensure a successful installation.
How to install interlocking vinyl flooring?
Interlocking vinyl flooring gives your home a sleek and modern look that will last for years. With its easy installation and wide range of customizable options, it can transform any room quickly. Here is a complete guide to installing interlocking vinyl flooring, provided in a step-by-step format for simplicity.
- Choosing Your Vinyl Planks: Vinyl planks come in several sizes and shapes, offering a wealth of choice to suit your specific needs. The size and shape of your room will dictate the installation methods.
- Measuring the Space: Start by measuring your space to determine how much material you’ll require. Don’t forget to add an additional 10 percent to your total to account for potential errors or additional cuts.
- Cleaning the Floor: Before installation, make sure your floor is clean and free of any debris or dust. These could potentially get trapped between the planks, leading to uneven surfaces or other issues.
- Laying the Planks: The next step is laying down the vinyl planks. You’ll need to use a tapping block and a mallet to secure the planks to the subfloor.
Remember that interlocking vinyl flooring is designed for DIY installation. However, for those less confident with such tasks, or for an assured professional finish, consider hiring a professional to do the job.
This guide should help you create a stunning transformation in your home with interlocking vinyl flooring, either by following the steps yourself or providing you with an understanding of the process if you opt for professional installation.
How to install marine vinyl flooring?

Give your boat’s interior a new look with marine vinyl flooring! Installing marine vinyl flooring is an easy and straightforward process, and with the right tools and materials, you’ll be able to finish the job in no time. From cutting the vinyl planks to applying transition strips, below is a complete step by step guide to help you install marine vinyl flooring:
| Step | Description | Tools Needed |
|---|---|---|
| 1 | Measure and Cut | Tape Measure, Utility Knife |
| 2 | Apply Adhesive | Adhesive, Putty Knife |
| 3 | Install Flooring | Vinyl Plank Flooring |
| 4 | Apply Transition Strips | Transition Strips, Hammer, Nails |
First, measure the space where the vinyl flooring will be installed and use a utility knife to cut the planks to size. Next, apply adhesive to the backside of the vinyl planks and spread it evenly with a putty knife. Once the adhesive is ready, carefully place the planks into the space and press down firmly to secure them. Finally, install transition strips around the edges of the flooring to give it a finished look. Secure the strips with nails or a hammer. With these simple steps, you’ll be able to install marine vinyl flooring with ease.
How to install outdoor vinyl flooring?
Enhance your open-air living areas with outdoor vinyl flooring! This choice can add an attractive and durable element to your patio, pool area, or any other outdoor environment. Outdoor vinyl plank flooring, being waterproof and resilient, is an ideal choice.
This straightforward guide, equipped with an itemized list, will help you swiftly install your outdoor vinyl flooring with ease.
Items Needed:
- Outdoor vinyl flooring of your choice
- Measuring tape
- Sharp utility knife
- Tongue-and-groove system
- Protective sealant
Steps to Follow:
- Selection of Material: The first step involves deciding on the most suitable outdoor vinyl flooring that complements your exterior setting. Remember, it’s important to select a product specifically designed for outdoor use. Consider the color and pattern that matches the aesthetics of your outdoor space.
- Measure and Purchase: After selecting the vinyl flooring, measure the area where you plan to install it. Purchase the necessary quantity of the material based on these dimensions.
- Prepare Tools: Ensure that you have a sharp utility knife ready for any required cutting. Additionally, you’ll need a tongue-and-groove system for joining the flooring pieces seamlessly.
- Installation: Begin by laying out the vinyl planks in the planned area. Connect them using the tongue-and-groove system. Check for any damages or imperfections in the planks and cut them accordingly to fit any unique shapes or corners.
- Sealing: After the flooring has been installed, apply a protective sealant to enhance its durability and longevity.
Enjoy your transformed outdoor living space with the newly installed vinyl flooring!
How to install vinyl flooring on stairs?

Installing vinyl flooring on your stairs is a straightforward, cost-effective method to upgrade the aesthetics of your home. The process is uncomplicated, requiring only basic tools, a few materials, and a bit of patience.
Here’s a step-by-step list on how to proceed:
- Prepare the Stairs: Start by preparing the stairs. This involves sanding the surfaces to smooth out any irregularities and then cleaning them thoroughly to remove dust and debris.
- Layout the Vinyl Planks: Begin laying out the vinyl planks on the stairs, ensuring they cover the desired areas. Remember, the better the layout, the better the end result.
- Cut the Vinyl Planks to Size: After laying out the planks, cut them to the required size to ensure they fit perfectly on each stair.
- Check for Squareness: Use a framing square to check the squareness of the planks. This step is important for maintaining the aesthetic symmetry of the flooring.
- Secure the Vinyl Planks: Secure the vinyl planks onto the stairs using a quality vinyl adhesive. This ensures the planks stay in place, providing a stable footing.
- Attach Shoe Molding: After the planks are secured, attach shoe molding along the edges of the stairs. This helps cover any rough edges, enhancing the finished look.
- Check and Fill any Gaps: Finally, inspect the installed vinyl flooring for any gaps in the seams. If any are found, fill them in with additional adhesive to ensure a seamless finish.
By following these steps, you can transform your staircase into an eye-catching feature of your home. Good luck on your DIY journey!
How to install vinyl flooring on walls?
Transforming your room’s appearance can be as simple as installing vinyl flooring on walls. A great way to add sophistication and a modern touch, this installation differs from stairs as it necessitates a more meticulous approach.
Follow these steps for a smooth installation:
- Gather Materials: Ensure you have the necessary supplies for the process. This includes vinyl planks, a paper template, glue, a light hammer, and a ruler or measuring tape.
- Create a Paper Template: The initial step is to make a paper template that will help guide the placement of your vinyl planks. This template is crucial to ensure the planks will be evenly spaced and fit correctly on the wall.
- Mark and Cut the Planks: With your template prepared, you’ll need to cut the vinyl planks to the appropriate size. Use the template to mark where the planks will be placed on the wall.
- Attach the Planks to the Wall: Start affixing the planks to the wall using a special adhesive or glue suitable for vinyl flooring. Be sure to apply enough glue for a firm hold but avoid excess that could seep out from the edges.
- Secure the Planks: After the planks are positioned, use a light hammer to tap them securely into place. This ensures a solid connection between the vinyl planks and the wall.
- Let it Dry: Allow adequate time for the glue to dry completely. This will depend on the type of glue used, so be sure to read the manufacturer’s instructions.
- Enjoy Your New Wall: After the glue has completely dried, your new, stylish wall is ready! This vinyl wall not only enhances the aesthetic of your room but also adds an extra layer of durability and easy cleaning.
Remember, patience is key during this process. Take your time to ensure each plank is placed correctly for a seamless and attractive finish.
Installing new vinyl flooring over existing vinyl or tile
Transforming your space with new vinyl planks over existing vinyl or tile flooring can drastically boost your home’s aesthetic appeal. This simple process only requires some essential tools and a bit of patience to successfully install the vinyl flooring.
For those working with sheet vinyl flooring, it’s necessary to remove the old flooring first and prepare the subfloor with a layer of adhesive. If you’re utilizing gluedown vinyl planks, ensure the current flooring is clean and level before adding a layer of adhesive to the subfloor.
Here’s a step-by-step guide to help you install either type of vinyl flooring with relative ease:
- Measure the room: Start the process by taking accurate measurements of the room.
- Cut the planks: Based on the measurements, cut your vinyl planks to the desired size.
- Leave expansion gaps: Make sure to allow for an expansion gap around the room edges.
- Apply adhesive: Apply a generous layer of adhesive to the back of the vinyl planks.
- Spread the adhesive: Using a trowel, evenly spread the adhesive across the subfloor.
- Install the planks: After the adhesive is evenly spread, position the planks and firmly press them into the adhesive.
- Secure the flooring: You can use a rolling pin or heavy object to secure the vinyl planks into the adhesive.
- Allow adhesive to cure: Let the adhesive cure for the duration recommended by the manufacturer before stepping on the flooring.
This step-by-step process demonstrates how with a bit of effort and meticulous planning, you can achieve a remarkable result by installing vinyl flooring over existing vinyl or tile. The end product is not only visually appealing but also offers enduring durability.
How to remove carpet and install vinyl flooring?
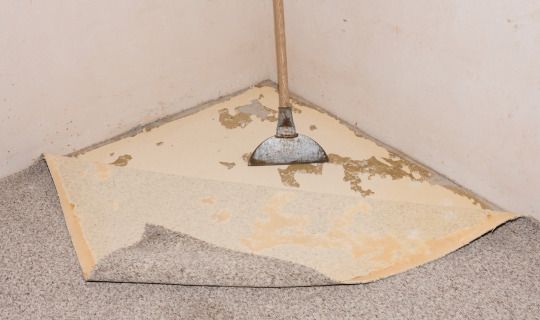
Transform your home with a beautiful, new vinyl floor by replacing your old, out-dated carpet! Removing your existing carpet and installing a vinyl floor can be a daunting task, but with the right tools and preparation, you can do it yourself.
Here’s what you’ll need to get started:
- A multi-tool to cut the carpet and separate it from the adhesive
- A flat-head screwdriver and or a pry bar to remove the tack strips around the edges of the room
- A utility knife to cut the carpet into small pieces for disposal
- Heavy-duty gloves to protect your hands from the tack strips
- Vinyl planks and adhesive and a trowel for installation of the new flooring
Follow the steps below to easily remove your existing carpet and install a vinyl floor. Make sure to wear protective eyewear and gloves at all times to keep yourself safe.
Start by removing the tack strips around the perimeter of the room with a flat-head screwdriver or pry bar. Once the strips are removed, use a multi-tool to cut the carpet and separate it from the adhesive. Cut the carpet into small pieces for disposal.
Prep the subfloor surface by sweeping it clean and filling in any gouges or cracks with wood filler. Before laying the vinyl planks, spread the adhesive with a trowel and use a roller to ensure that it sticks to the subfloor.
Install the vinyl planks and be sure there’s enough space between the walls and the planks for expansion. Lastly, make sure to wipe away any excess adhesive.
Special Cases in Vinyl Flooring Installation
When installing vinyl flooring, there are some special cases you’ll need to consider.
For bathrooms, you can install the flooring without having to remove the toilet.
For pontoon boats, you can also install vinyl flooring in a few easy steps.
Before tackling either of these projects, it’s important to familiarize yourself with the specific guidelines and instructions that the manufacturer provides, as they can vary.
How to install vinyl flooring in a bathroom without removing toilet?
You don’t have to remove your toilet to install vinyl flooring in your bathroom. Here’s how to do it in simple steps. Whether you decide to go with vinyl planks or tile floors, this method makes installation easier and more efficient.
Depending on your personal preference, you can choose from vinyl planks or tile floors. Vinyl planks are a great choice for bathrooms due to their ability to withstand high traffic and water. They’re also easy to install and come in a variety of sizes, textures, and colors. On the other hand, tile floors provide a timeless look with ample customization options. Most tiles even come with pre-applied adhesive to ease the installation process.
Before you get started, ensure the floor surface is clean, dry, and level. With these prerequisites met, you’re ready to install your new vinyl flooring.
Here are the steps to follow:
- Choose the Vinyl Type: Decide between vinyl planks or tiles, based on your preference. Consider factors such as traffic, water resistance, ease of installation, and available styles.
- Prepare the Surface: Ensure that your existing bathroom floor is clean, dry, and level. Any imperfections can affect the final result of your vinyl installation.
- Measure the Floor: Start the actual process by measuring the floor accurately. These measurements will guide the cutting of your vinyl planks or tiles.
- Cut the Vinyl: Based on your measurements, cut the vinyl planks or tiles to the correct size. Make sure your cuts are precise for a neat installation.
- Install the Vinyl: Leave a 1/8 inch gap between the wall and the vinyl for expansion. This is an essential step to avoid future warping or distortion of your flooring.
- Secure the Vinyl: Lastly, use a roller to press the vinyl planks or tiles firmly into position. This ensures they are well secured and unlikely to move.
By following these steps, you can successfully install vinyl flooring in your bathroom without the inconvenience of having to remove the toilet.
How to install vinyl flooring on a pontoon boat?
Installing vinyl flooring onto a pontoon boat can give it a fresh, new look – and it’s easier than you think! If you’re looking to upgrade the look of your pontoon boat, vinyl planks are an excellent way to do so. To make this task easier, follow the step-by-step guide below:
Materials and Tools You’ll Need:
- Vinyl Planks: These will serve as the new flooring for your pontoon boat. Choose a style that fits your preference and budget.
- Measuring Tape: To measure the length and width of the area you want to cover with vinyl planks.
- Tin Snips: These are useful for cutting the vinyl planks.
- Utility Knife: This will help in making more precise cuts if necessary.
- Double-sided Tape: You will use this to secure the vinyl planks to the pontoon boat’s floor.
Steps to Install Vinyl Flooring:
- Measure the Space: Use your measuring tape to determine the length and width of the area you want to cover. This will help you calculate how many vinyl planks you’ll need to purchase.
- Purchase the Vinyl Planks: Once you’ve determined the quantity required, go ahead and purchase your vinyl planks. Keep in mind that the costs can vary depending on the style and size, but you can typically find planks that fit within your budget.
- Cut the Planks: Use your tin snips or utility knife to cut the vinyl planks to the required sizes. Always remember that it’s better to cut a little bigger at first – you can always trim it down later if needed.
- Secure the Planks: Use double-sided tape to secure the vinyl planks to the floor of the pontoon boat. Ensure they are placed securely and evenly.
By following these steps, you can revamp the look of your pontoon boat with vinyl flooring. Not only is it cost-effective, but it’s also a practical and stylish solution for a pontoon boat makeover.
Frequently Asked Questions
In Summary,
You’ve just completed installing your new vinyl flooring, and it looks great! You should be proud of your work.
You took the time to properly prepare the space and followed the step-by-step instructions. The process wasn’t too difficult, but you can now appreciate the skill and precision that goes into installing vinyl flooring.
Now you have the satisfaction of knowing that you can handle any vinyl flooring installation task that comes your way!