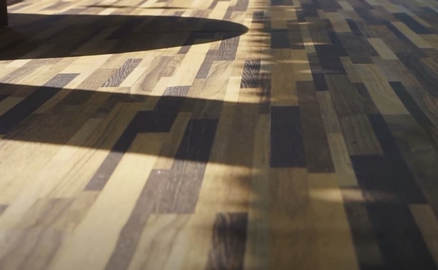
How To Fix Side Gaps In Laminate Flooring
Have you noticed side gaps in your laminate flooring? If so, you’re not alone. Side gaps are a common problem…
Have you noticed side gaps in your laminate flooring? If so, you’re not alone. Side gaps are a common problem that many homeowners face with their laminate flooring. They can be caused by a variety of factors, including changes in temperature and humidity, improper installation, and poor quality flooring.
But don’t worry, fixing side gaps in your laminate flooring is not as difficult as it may seem. With the right tools and a little bit of know-how, you can repair your flooring and restore its appearance and functionality.
In this article, we’ll walk you through the process of fixing side gaps in your laminate flooring, step-by-step. We’ll also provide you with tips for maintaining your flooring to prevent side gaps from occurring in the future.
So, let’s get started!
Understanding the Causes of Side Gaps in Laminate Flooring
Before we jump into what’s causing those pesky little openings between your planks, let’s take a moment to understand the intricate dance that is laminate flooring.
Laminate flooring is a floating floor system, which means that the individual planks interlock with one another, but they do not attach to the subfloor. The planks are usually made of high-density fiberboard (HDF) or medium-density fiberboard (MDF) with a printed image of wood or stone on the surface. The planks are typically coated with a protective layer of melamine, which makes them durable and resistant to scratches and stains.
Common mistakes that can cause side gaps in laminate flooring include improper acclimation, incorrect installation, and poor subfloor preparation.
Laminate flooring must be acclimated to the room’s temperature and humidity before installation to prevent buckling, warping, and side gaps. When installing laminate flooring, it’s essential to follow the manufacturer’s instructions carefully.
The planks should be installed with a small gap between them and the walls to allow for expansion and contraction. If the gap is too small, the planks will push against each other, causing side gaps.
Prevention techniques for side gaps in laminate flooring include proper acclimation, careful installation, and subfloor preparation.
Before installation, the subfloor should be clean, dry, and level. Any bumps or irregularities should be smoothed out with a leveling compound. The planks should be installed with a small gap between them and the walls and should not be nailed, glued, or screwed to the subfloor.
To prevent moisture from seeping into the subfloor, a moisture barrier should be installed between the subfloor and the laminate flooring.
In conclusion, understanding the causes of side gaps in laminate flooring is essential for preventing them from occurring. Common mistakes, such as improper acclimation, incorrect installation, and poor subfloor preparation, can cause side gaps. Prevention techniques, such as proper acclimation, careful installation, and subfloor preparation, can help prevent side gaps from occurring. By following these guidelines, you can ensure that your laminate flooring looks great and performs well for years to come.
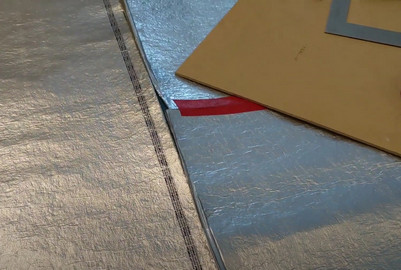
Tools You’ll Need to Fix Side Gaps
You’ll need a few tools to get started, so make sure you have everything on this list before you begin.
First, you’ll need a laminate cutter, which is a special tool for cutting laminate flooring. This will help you make precise cuts to fix the side gaps in your flooring. You can purchase a laminate cutter at your local hardware store or online.
Second, you’ll need wood glue to fill in the gaps between the laminate planks. Wood glue is a strong adhesive that will help keep the planks in place and prevent further gaps from forming. Make sure you choose a wood glue that is suitable for laminate flooring and follow the manufacturer’s instructions for use.
Lastly, you’ll need a rubber mallet to gently tap the planks into place once you have filled in the gaps with wood glue. This will ensure that the planks are snugly fitted together and will prevent any further movement. You can also use a tapping block, which is a special tool designed for this purpose. These tools are also available at your local hardware store or online.
With these tools in hand, you’re now ready to fix the side gaps in your laminate flooring.
Remember to take your time and work carefully to ensure a smooth and even finish. Once you’re finished, you’ll have a beautifully restored floor that looks as good as new.
Preparing Your Laminate Flooring for Repair
To properly repair any imperfections in your laminate flooring, it’s essential to prepare the surface by thoroughly cleaning it and removing any debris or obstructions. This is especially important if you’re repairing side gaps, as any dirt or dust that has accumulated within the gaps can interfere with your repair efforts.
Here are a few things you’ll need to do to prepare your laminate flooring for repair:
-
First, clear the area around the damaged section of flooring. Remove any furniture or obstacles that might get in your way while you work.
-
Next, vacuum or sweep the area around the damaged section of flooring. Make sure to remove any dirt or debris that might be hiding in the gaps between the planks.
-
Finally, give the damaged section of flooring a good wipe-down with a damp cloth. Use a gentle cleaning solution if necessary, but make sure to avoid using any harsh chemicals that could damage the laminate.
By taking the time to properly prepare your laminate flooring for repair, you can ensure that your repair efforts are successful and long-lasting. So don’t skimp on this important step!
Step-by-Step Guide to Fixing Side Gaps
Now it’s time to get your hands dirty and tackle those pesky spaces between your planks that are causing you frustration. But before we dive into the step-by-step guide to fixing side gaps in laminate flooring, let’s first discuss some common mistakes to avoid. One common mistake is to use excessive force to close the gaps, which can damage the planks and make the problem worse. Another mistake is to ignore the underlying cause of the gaps, which could be due to improper installation or moisture issues. Before starting the repair, make sure to address these issues to prevent the gaps from reappearing.
Now, let’s move on to the step-by-step guide to fixing side gaps in laminate flooring. The following table outlines the materials and tools you will need and the steps to follow to close the gaps.
| Materials | Tools |
|---|---|
| Wood glue | Hammer |
| Wood putty | Chisel |
| Joint compound | Pull bar |
| Painter’s tape | Tapping block |
-
Clean the gaps: Use a vacuum or a soft-bristled brush to remove any debris from the gaps.
-
Apply wood glue: Apply a small amount of wood glue to the tongue of the plank that is adjacent to the gap.
-
Close the gap: Use a tapping block and a hammer to gently tap the plank into place until the gap is closed.
-
Secure the plank: Use a pull bar to secure the plank in place.
-
Remove excess glue: Wipe off any excess glue with a damp cloth.
-
Fill the gaps: Use wood putty or joint compound to fill any remaining gaps.
-
Sand and refinish: Sand the patched area and refinish it to match the rest of the floor.
If the gaps are too large to close with this method, an alternative solution is to remove the affected planks and replace them with new ones. However, this requires more time, effort, and expertise and may not be necessary in most cases.
In summary, fixing side gaps in laminate flooring is a relatively simple task if done correctly. By avoiding common mistakes and following the step-by-step guide outlined above, you can achieve a seamless and beautiful floor that will last for years to come.
Tips for Maintaining Your Laminate Flooring
Maintaining your laminate floors is crucial to keeping them looking their best and ensuring their longevity. Here are some tips to help you maintain your laminate flooring:
-
Choose the right underlayment: The underlayment is an important part of your laminate flooring, as it helps to reduce noise and provide additional insulation. When choosing an underlayment, it’s important to consider the type of flooring you have, as well as the subfloor. A high-quality underlayment can help to prevent moisture from seeping into your laminate flooring, which can cause damage over time.
-
Clean your laminate floors regularly: One of the most important things you can do to maintain your laminate floors is to clean them regularly. Use a soft-bristled broom or a microfiber mop to remove dirt and debris from your floors. Avoid using harsh chemicals or abrasive scrubbers, as these can damage your flooring and cause scratches.
-
Use furniture pads: To prevent scratches and scuffs on your laminate floors, it’s important to use furniture pads on the legs of your furniture. These pads can help to distribute weight more evenly, reducing the risk of damage to your flooring.
-
Repair damage promptly: If you notice any damage to your laminate flooring, such as scratches or dents, it’s important to repair it promptly. This can help to prevent further damage and ensure the longevity of your flooring.
By following these tips, you can help to maintain the beauty and longevity of your laminate flooring for years to come.
Conclusion
Well, that’s all there is to it! Fixing side gaps in laminate flooring may seem daunting at first, but it’s definitely doable with the right tools and some patience.
Remember to take the time to identify the cause of the gaps and properly prepare your flooring before attempting any repairs.
And always keep in mind the importance of maintaining your laminate flooring to prevent future gaps from occurring.
With these tips and tricks, you’ll be well on your way to a beautiful, gap-free floor. So don’t let those pesky side gaps get you down – grab your tools and get to work!