How to stagger vinyl plank flooring
Installing vinyl plank flooring can be a great way to give your home a fresh and updated look. But if you want to achieve the best results, it’s important to know how to stagger your flooring correctly. Staggering the planks creates a more aesthetically pleasing appearance and makes your floor more durable.
In this article, we’ll show you how to properly stagger vinyl plank flooring for a beautiful and long-lasting finish. Staggering vinyl plank flooring is easy when you have the right tools and know the correct technique. We’ll take you through each step of the process so that you can confidently install your new floor with ease.
From measuring out the planks to cutting them accurately, we’ve got all the advice and tips you need to create a stunning end result. Let’s get started!
Necessary Equipment For Installation
Installing vinyl plank flooring can be a rewarding and transformative project, but having the right tools and equipment on hand is crucial for a smooth and efficient process. Here’s a comprehensive list of indispensable equipment that will not only guarantee a successful installation but also keep you safe throughout the endeavor:
- Tapping block: For gently tapping planks into place without damaging them.
- Jigsaw: A versatile cutting tool for trimming planks to fit unique spaces.
- Mallet: Helps secure planks tightly without causing damage.
- Measuring tape: Ensures accurate measurements for a precise and professional finish.
- Chalk line: Assists in creating straight lines for proper plank alignment.
- Safety glasses: Protects your eyes from debris and dust.
- Ear protection: Minimizes noise exposure during cutting and tapping.
- Respirator: Filters harmful particles and fumes for a healthier work environment.
- Utility knife: Allows for precise cutting of planks and trimming edges.
- Saw horses: Provides a stable surface for cutting and measuring planks.
- Drill: Handy for drilling holes and securing planks when necessary.
- Spacers: Maintains consistent gaps between planks and walls for proper expansion.
- Adhesive: Ensures a strong bond between planks and the subfloor.
- Gloves: Shields hands from cuts, scrapes, and adhesive residue.
- Knee pads: Offers comfort and protection during extended periods of kneeling.
Armed with these essential tools, you’ll be well-prepared to tackle your vinyl plank flooring installation project with confidence and ease.
Spacing Rules For Staggering
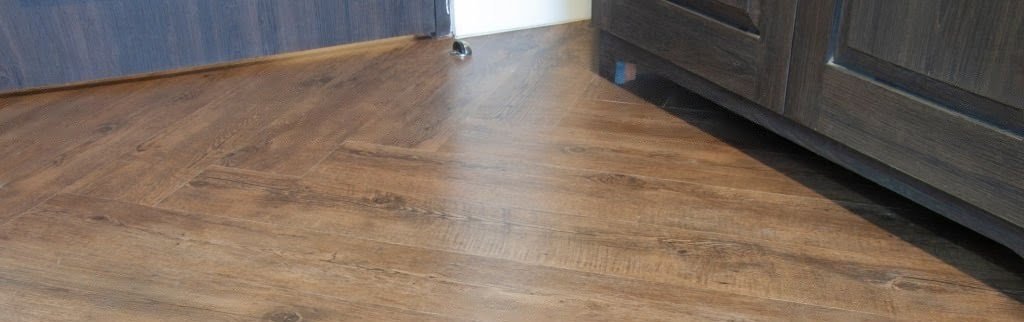
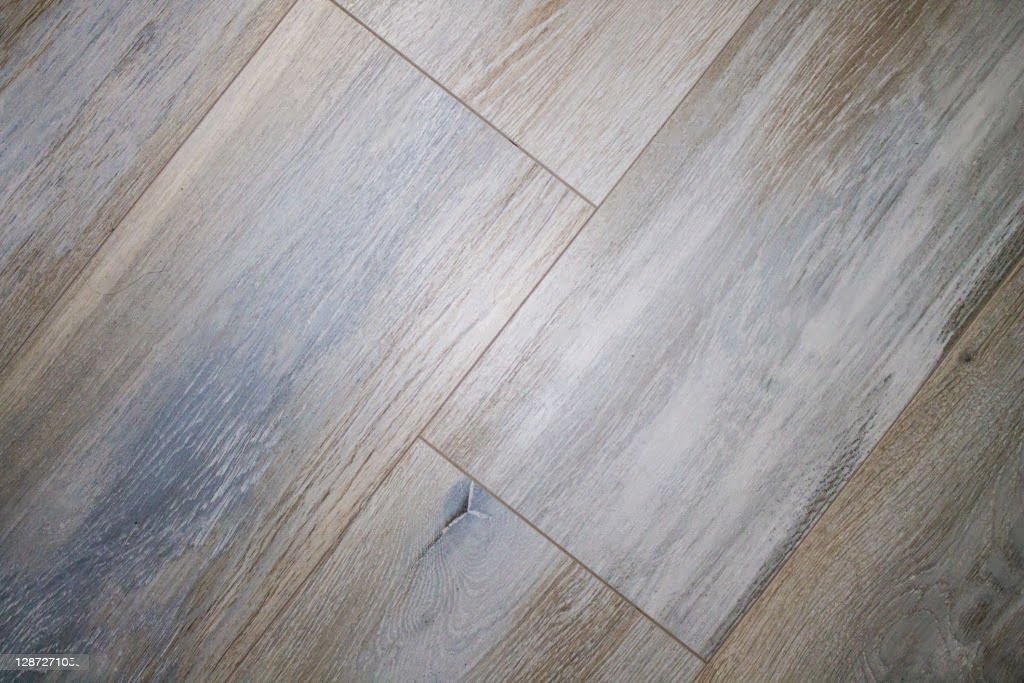
When laying vinyl plank flooring, it’s important to use an offset pattern for the best results. That means the planks should be laid in a staggered pattern, with the joints of each row being offset from the joints of the adjacent rows.
It’s also important to pay attention to the end joints, which should be at least 8 inches away from the end joints of adjacent rows. This helps create a stronger, more stable flooring system.
Offset Pattern
Installing vinyl plank flooring can be a daunting task, but if you take your time and follow the proper spacing rules for staggering, the outcome will be rewarding.
When it comes to staggering, a popular technique is creating an offset pattern. This means that each plank in one row should be placed so that it is halfway over the joints of the adjacent plank rows. This creates a staggered pattern that not only looks aesthetically pleasing but also adds extra stability to your new flooring.
If you take care to properly space out your planks when laying them down, your vinyl floor will look beautiful for years to come!
End Joints
The installation process of vinyl plank floors also involves paying attention to end joints. This means that the planks should not join together along a single edge. According to industry standards, an end joint should be at least 6 inches from any other end joint. This helps ensure a stable floor and prevents buckling or warping of your new flooring.
It’s important to measure twice before cutting, as even a slight miscalculation could ruin your entire installation process. Once you’ve taken care to properly space out the joints, you’ll need to keep in mind the stagger length when laying down the planks. This is the distance between two consecutive end joints on each row and should typically be at least 8 inches long.
When done correctly, this will create an offset pattern which will add extra stability to your newly installed vinyl plank floors while still looking aesthetically pleasing. Lastly, it’s important to make sure that all rows are aligned properly with one another. If their edges aren’t even or if there are any gaps between them, you may need to adjust the planks until they fit together perfectly.
Following these simple rules will help guarantee that your new vinyl plank floors look beautiful for years to come!
Preparation For The Process
Accurate measurements are essential, so make sure to take them before you start.
Inspect the subfloor to see if any repair work needs to be done.
Establish a layout before you begin handling the flooring materials.
Don’t forget to wear protective gear while you’re working.
You’ll need cutting tools, glue, an adhesive spreader, and underlayment, as well as spacing tools, a tapping block, hammer, pencil, tape measure, and a chalk line.
Have everything ready before you start the process.
Accurate Measurements
Accurate measurements are essential when preparing to lay down a row of luxury vinyl planks. To ensure the flooring is installed correctly, you must measure each wall carefully and mark them with a pencil or chalk.
Furthermore, it’s important to leave a proper expansion gap around the perimeter of the room to accommodate for any movement of the planks due to temperature changes. This helps prevent buckling, cracking and other damage.
When measuring and laying out your planks, always double check your measurements before cutting to ensure accuracy. With these steps taken into account, you can be sure that your floor will look great for years to come!
Subfloor Inspection
Once the measurements have been taken and the expansion gap has been left, it’s time to take a look at your subfloor.
A resilient plank floor requires an even, flat surface in order to be installed correctly in order to achieve an eye-catching pattern.
Therefore, it’s important that you inspect the subfloor for any bumps or irregularities.
If any are found, they must be sanded down or filled in before installation can begin.
This will help ensure that your flooring is properly installed and looks great for years to come!
Establishing Layout
Once you’ve prepped the subfloor and ensured that it’s even and flat, it’s time to begin laying out your planks.
You’ll want to start a row of planks along one wall, allowing for the expansion gap all along the edge.
From there, you’ll need to measure and mark off the entire floor before starting each row of planks.
This will help ensure that your luxury vinyl planks are properly aligned and spaced correctly.
Make sure to take into account any doorways or other obstacles as well, so you don’t end up with an uneven pattern or gaps in your flooring.
With careful planning and attention to detail, you can create a beautiful floor that will last for years!
Techniques For Placement
Let’s start at the wall; that’s the best place to begin.
Then, we’ll measure and mark the planks to get them laid out correctly.
You’ll need to make sure the planks fit together properly, so don’t forget to leave space for expansion.
Finally, once you’ve got everything marked, you can start laying the planks.
Start At The Wall
When it comes to installing vinyl plank flooring, the first step is to start at the wall. This ensures that your new floor has an even aesthetic appeal across the entire room.
Placing the first plank of vinyl against the wall and working outwards gives you a starting point and keeps everything in line.
To ensure that each row remains level and straight, use a spacer between each plank. This will also help you to keep an equal distance between each one and give your floor a professional finish.
With just a handful of tools and some patience, you’ll have your new vinyl plank flooring installed in no time!
Measure And Mark Planks
Now that you know where to start, it’s time to measure and mark your planks.
You’ll want to make sure each plank is cut correctly so it fits perfectly along the wall.
To do this, use a measuring tape to mark each plank with the length and width of the space you’re working with.
Then use a pencil or marker to draw lines on each plank in order to guide your saw.
Once you have all of your planks marked and measured, you’re ready for the next step: cutting!
Benefits Of Staggering
Staggering vinyl plank flooring has multiple benefits, such as improved stability and enhanced aesthetics.
It helps secure the planks together and prevents them from shifting or buckling, which adds to its overall stability.
The staggered pattern also creates a more visually appealing look than just a straight line, making it a great option for those looking to enhance the aesthetics of their floor.
Overall, the advantages of staggering vinyl planks are worth the extra effort.
Improved Stability
Installing vinyl plank flooring is an excellent choice for many homeowners, as it provides improved stability and a longer lasting finish. Staggering the planks when installing them can significantly improve the stability of your flooring, making it much less likely to buckle or move over time.
This is especially important if you’re planning to install the flooring in a high traffic area. The staggered pattern ensures that each plank has its own space to expand and contract without affecting its neighbours. It also creates a much stronger bond between the planks, which holds them together more securely than if they were installed side by side.
Plus, the staggered pattern gives your floor a unique look and adds visual interest to any room. All in all, staggering vinyl plank flooring during installation offers numerous benefits that can help you create a beautiful, long-lasting result.
Enhanced Aesthetics
Not only does staggering vinyl plank flooring make it more stable and long-lasting, but it also enhances the aesthetic of any room.
The unique pattern created by the staggered planks helps to break up any monotony in the room and adds depth and texture to your floor. This makes it perfect for any style of décor, from modern to traditional. Plus, you can create a custom look with different colors and finishes.
The staggered pattern also gives you more flexibility when arranging furniture, as it takes away the need to adjust around a continuous pattern. You can easily move pieces around while still achieving a balanced look that complements the rest of the room’s design.
What’s more, you don’t have to worry about compromising the stability of the floor because of this rearranging – since each plank has its own space thanks to being staggered during installation, there’s no risk of buckling or shifting with furniture placement changes.
Overall, staggering vinyl plank flooring offers a number of advantages in terms of both stability and aesthetics. Whether you’re looking for a classic or modern look, this method ensures that your floor will be beautiful and secure for years to come.
Common Mistakes
- Not allowing for expansion is one of the most common mistakes when it comes to laying vinyl plank flooring; it can lead to buckling and damage to the floor.
- Another common mistake is not properly preparing the subfloor before installation; it should be clean, dry, and level.
- Incorrect cutting technique is also a common blunder; use a sharp blade and a straight edge for the best results.
- Not leaving space for expansion can result in buckling and other damage to the floor; it’s important to leave a gap around the edges and in between each plank.
- If the subfloor hasn’t been properly prepared, it can cause issues with the planks not fitting together properly; make sure it’s clean, dry, and level before installation.
- Improperly cutting the planks can cause them to not fit together correctly; use a sharp blade and a straight edge to ensure the best results.
Not Allowing For Expansion
Not allowing for expansion when laying vinyl plank flooring can be a costly mistake.
It’s easy to get caught up in the moment, and forget that the planks need room to expand and contract with temperature changes.
Without leaving extra space at the edges of the room, you may find yourself with gaps between the planks as they expand and contract over time.
To avoid this costly mistake, measure your room carefully before laying any vinyl planks, and leave an eighth of an inch gap around all walls.
This will give your flooring enough space to move without affecting the look of your finished product.
With a little bit of planning, you can have a beautiful new floor that will last for years to come!
Poor Subfloor Preparation
Poor subfloor preparation is a common mistake when laying vinyl plank flooring. Not taking the time to properly prepare the subfloor can lead to future problems with your flooring, such as warping and buckling.
It’s important to clean and level the subfloor before you begin installation of your vinyl planks. Any imperfections in the surface should be filled in with a leveling compound, and any old adhesive should be removed.
If you don’t take these steps prior to installation, your floor may not lay flat and could end up costing you money down the road. So don’t forget to take the extra time to make sure your subfloor is ready for vinyl planks!
With that said, it’s also important not to pour too much money into prepping an existing floor if it’s going over tile or other hard surfaces; sometimes a good cleaning is all that’s needed.
Poor Cutting Technique
Poor cutting technique is another common mistake when laying vinyl plank flooring. When you’re cutting your planks, it’s important to make sure that you’re using a sharp blade and that the cuts are straight. If not, then you may end up with crooked planks that don’t fit properly into your design.
It’s also important to measure twice before you cut, as one wrong measurement could ruin an entire plank. To avoid any issues with cutting, it’s best to practice on scrap pieces of material first. This will help you get used to the tools and techniques needed for cutting your planks.
Once you feel comfortable with the process, then you can begin working on your project with confidence. This is why taking the time to do some research and practice beforehand is so important when laying vinyl plank flooring; it can save you from costly mistakes down the road.
So don’t skip out on these crucial steps!
Cost Considerations
I’m looking into the cost considerations for staggering vinyl plank flooring.
The cost of materials will be a big factor, so I’ll need to look into prices for the materials needed.
Labor costs will also be important to consider, so I’ll need to get some quotes from local installers.
Installation methods can also affect the cost, so it’s important to determine how I want the floor laid out.
That will determine the type of installation I’ll need and the associated costs.
I’ll also need to factor in additional costs like baseboards, sealers and other materials that may be needed.
All of these cost considerations will help me budget for my project and make sure I’m getting the best value.
Cost Of Materials
When it comes to the cost of materials for vinyl plank flooring, there’s a lot to consider.
The material itself can range in price, with low-end materials costing as little as $2 per square foot, while high-end materials can go up to $7 per square foot.
Of course, you’ll also need to factor in other costs like adhesive and grout, which can add up quickly.
Additionally, you may also need to purchase additional supplies such as underlayment or leveling compounds for more complex installations.
All of these factors should be taken into account when calculating the total cost of your project.
Ultimately, it’s important to shop around and compare prices from different retailers to make sure you’re getting the best deal on your flooring installation.
Labor Costs
Labor costs can be a major factor in the cost of vinyl plank flooring.
In most cases, you’ll need to hire a professional installer to do the work for you.
Depending on who you hire and the complexity of your project, labor costs can vary greatly.
For instance, a basic installation may cost around $1 to $2 per square foot, while more complex installations with special features can cost up to $4 per square foot.
It’s important to compare rates from various installers before committing to any one person or company.
Furthermore, be sure to inquire about any additional charges that might not be included in their quote.
That way, you’ll know exactly what your total cost will be before signing anything.
Installation Methods
Well, labor costs aren’t the only thing to consider when it comes to vinyl plank flooring.
Another important factor is installation methods. Depending on what type of flooring you have and the area you’re installing it in, there may be different installation techniques that need to be used.
For instance, some types of flooring will require glue while others may need to be nailed down. And if you’re installing in a bathroom or other wet area, there may be extra steps involved to waterproof the floor.
So it’s important to discuss these details with your installer before making any decisions. If they don’t already know what needs to be done, they should be able to research it for you quickly and easily. That way, you can get an accurate quote for the job without any surprises later on.
Frequently Asked Questions
Do I need a professional to install vinyl plank flooring?
Many homeowners successfully install vinyl plank flooring themselves. While professionals can help with details like plank staggering, up to 80% of DIYers complete the installation without assistance.
How long does vinyl plank flooring installation take?
Typically, it takes 4-8 hours to install vinyl plank flooring in an average-sized room. Inexperienced DIYers or those staggering planks may require more time.
Is the installation process the same for all vinyl plank flooring types?
Generally, the installation process is similar for all types of vinyl plank flooring. Minor differences may exist depending on the specific product.
Can I stagger vinyl plank flooring on an uneven surface?
Yes, you can stagger vinyl plank flooring on an uneven surface. Adjustments like cutting planks shorter or using adhesive might be necessary to ensure a proper fit.
What safety precautions should I take during installation?
Wear protective gear (gloves, goggles, dust mask or respirator), be cautious with power tools, keep the area clear of trip hazards, and have a partner nearby to help with lifting or carrying planks.
Conclusion
Installing vinyl plank flooring is a great way to update your home and can be done in a relatively short amount of time. There are some important factors to consider when installing, such as the type of flooring and the surface it’s being installed on.
It’s possible to stagger the planks for a more aesthetically pleasing look, but it may require more time and effort. As the old adage goes, ‘measure twice, cut once’; taking extra care will ensure that you get the results you want.
With proper preparation and planning, anyone can handle this task with confidence and enjoy their new floors for years to come.