Effortless Drywall Mud Removal from Vinyl Flooring
Struggling with drywall mud on your vinyl floors? Our comprehensive guide at OkayFlooring provides easy-to-follow steps to remove drywall mud and restore your floor’s original beauty.

Key Takeaway
- Drywall mud can be a nuisance when it gets on vinyl flooring, but it’s not impossible to remove.
- The first step is to let the mud dry completely, as this makes it easier to remove without smearing.
- Use a plastic putty knife to gently scrape off the dried mud, taking care not to scratch the vinyl.
- For stubborn spots, a solution of warm water and dish soap can be used to soften the mud before scraping.
- After the mud is removed, clean the area with a vinyl floor cleaner to remove any residue and restore the shine.
What is Drywall Mud?
Drywall mud, also known as joint compound, is a substance commonly used in the construction and remodeling industry to smooth and hide the seams between sheets of drywall. It is a thick paste that dries to a hard finish, providing a smooth and even surface for painting or wallpapering. While essential for achieving a professional-looking finish, drywall mud can be messy and difficult to clean, especially if it gets onto vinyl flooring. With the right cleaning techniques, however, you can effectively remove drywall mud from vinyl flooring without causing any damage.
In this guide, we will explore various methods and tools that will make the task of removing drywall mud from vinyl flooring quick and easy. From simple at-home remedies to specialized cleaning products, we will cover everything you need to know to restore your vinyl flooring to its original pristine condition. So, let’s get started and say goodbye to those unsightly drywall mud stains on your vinyl flooring.
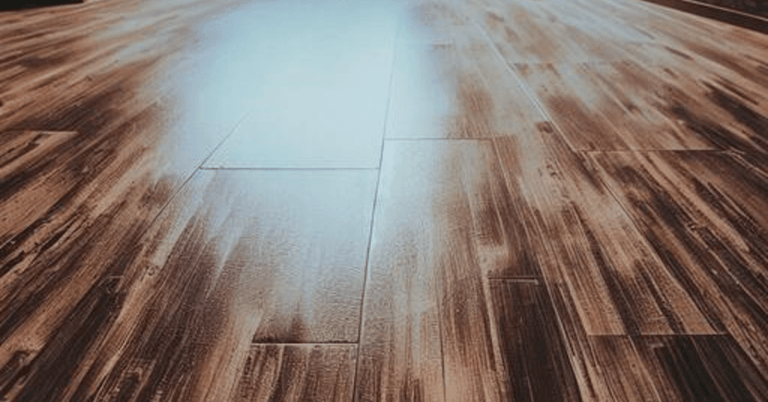
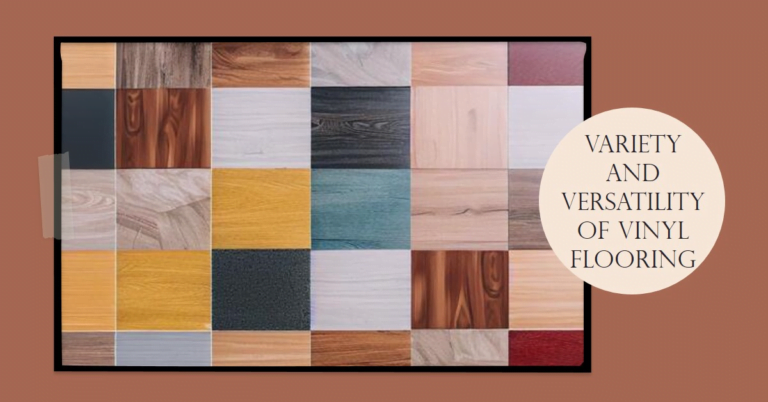
Types of Vinyl Flooring
There are several types of vinyl flooring commonly found in homes, with Luxury Vinyl Plank (LVP) being a popular choice. LVP mimics the look of hardwood floors but is more affordable and easier to maintain.
When it comes to cleaning LVP, it’s important to first remove any dust or debris from the floor. This can be done by either sweeping or vacuuming the floor. Be sure to use a soft-bristled brush or a vacuum cleaner with a hard floor attachment to avoid scratching the surface.
Once the dust has been removed, you can proceed with mopping the floor. Mix a mild non-abrasive cleaner with warm water and use a mop or a damp cloth to clean the floor. Avoid using abrasive cleaners or excessive amounts of water, as these can damage the LVP.
For other types of vinyl flooring, such as sheet vinyl or vinyl tiles, the cleaning process may vary. However, the first step should always be to remove any dust or debris from the floor using a vacuum cleaner or a broom
Safety Considerations
When dealing with drywall mud on vinyl flooring, it’s important to prioritize safety to avoid any potential health hazards or damage to the floor. Firstly, ensure that you have the necessary protective gear, such as a dust mask and goggles, to minimize inhalation of dust particles and protect your eyes. To prevent scratching the vinyl flooring, use a soft-bristled brush or a vacuum cleaner with a hard floor attachment to remove any drywall dust or debris before cleaning. It is also advisable to lay down a drop cloth to protect the floor from any additional mess during the cleaning process. Finally, be cautious when using any cleaning solutions, ensuring they are suitable for use on vinyl flooring and avoiding abrasive cleaners that could potentially damage the floor’s finish. By following these safety considerations, you can effectively remove drywall mud from vinyl flooring while safeguarding both your health and the integrity of the floor.
Protective Gear
When removing drywall mud from vinyl flooring, it is crucial to wear the necessary protective gear to prevent health issues and damage from drywall dust exposure. Protective gear is essential as drywall dust contains fine particles that can cause severe respiratory problems and skin irritation.
The most crucial piece of protective gear is a dust mask, which filters out the dust particles. Additionally, wearing goggles will protect your eyes from any dust that may become airborne during the cleaning process. Gloves are also necessary to protect your hands from the drying effects of the mud and any potential irritants. It is advisable to wear a long-sleeved shirt to protect your skin from direct contact with the dust.
By wearing the appropriate protective gear, you can minimize the risk of health issues and prevent damage from drywall dust exposure. Take the necessary precautions to ensure your safety and well-being while working with drywall mud.
Proper Ventilation
Proper ventilation is crucial when working with drywall to minimize the health risks associated with inhaling drywall dust. Adequate airflow is essential in creating a well-ventilated work area. Here are some key steps to ensure proper ventilation:
1. Open windows and doors: Increase the airflow in the room by opening windows and doors. This allows fresh air to come in and helps remove airborne dust particles.
2. Use fans: Place fans strategically in the room to improve air circulation. Position them to blow air out of the work area, directing the dust away from you.
3. Set up an exhaust system: If possible, install an exhaust system, such as a ventilation fan, to pull the dust out of the room. This helps in maintaining clean air and reducing the concentration of drywall dust.
4. Seal off other rooms: Close off any adjacent rooms or spaces to prevent the spread of dust to other areas of the house. Use plastic sheeting to cover doorways and create a barrier.
5. Wear a dust mask: Even with proper ventilation, it’s vital to wear a dust mask to further protect your respiratory system from drywall dust particles that may still be present in the air.
Remember, inhaling drywall dust can lead to respiratory issues and other health risks, so taking these steps to ensure proper ventilation is crucial. By creating a well-ventilated work area, you can minimize the concentration of dust in the air and reduce the potential harm to your health.
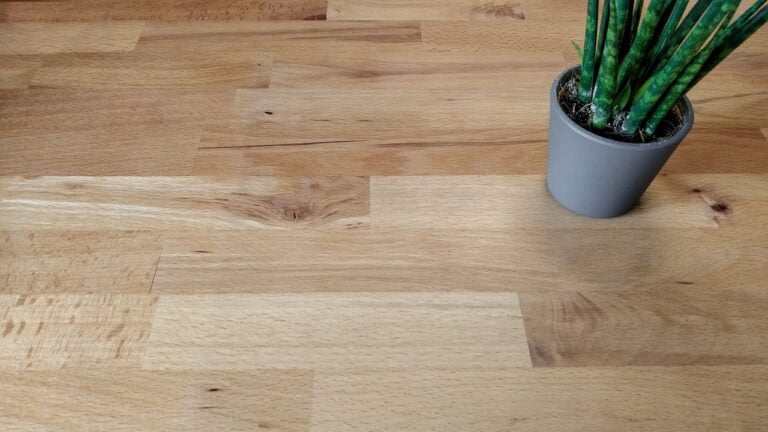
Preparing the Area
Preparing the Area: Before starting the cleaning process, it’s important to prepare the area properly. Begin by removing any furniture or objects that may obstruct your cleaning. This will allow you to have easy access to the entire floor and ensure a thorough cleaning.
Next, cover any nearby items or surfaces with a drop cloth or plastic sheeting to protect them from any potential damage or dust accumulation.
Additionally, consider using sweeping compound on the vinyl flooring before cleaning to help gather up loose dust and dirt. By taking these steps to prepare the area, you can ensure a more efficient and effective cleaning process.
Cover the Floor with a Drop Cloth
When working with drywall, it’s essential to protect your vinyl flooring from drywall dust and debris. One effective way to do this is by covering the floor with a drop cloth. This simple step can save you time and effort in the cleaning process.
To cover the floor with a drop cloth, start by laying a plastic sheet or cloth over the entire area. Ensure that the drop cloth completely covers the floor, leaving no gaps for dust particles to escape and settle on the vinyl surface. By doing so, you can prevent any potential damage or discoloration caused by the drywall dust.
For added security, tape down the edges of the drop cloth to keep it in place during the construction work. This will ensure that no dust or debris can sneak under the protective covering and onto your vinyl flooring.
By following these instructions and taking the necessary precautions, such as using a drop cloth, you can minimize the risk of dust accumulation on your vinyl flooring. This will save you time and effort in the cleaning process, allowing you to enjoy your freshly renovated space hassle-free.
Vacuum the Floor to Remove Dust and Carpet Fibers
When it comes to getting drywall mud off vinyl flooring, one important step is to start by vacuuming the floor to remove any dust and carpet fibers. This will ensure a clean surface before tackling the drywall mud.
To begin, use a vacuum cleaner with a HEPA filter to effectively capture and contain the dust particles. The HEPA filter is designed to trap even the smallest dust particles, providing a thorough cleaning result.
Start by tapping areas with visible or suspected dust using a brush. This will help loosen any stubborn dust particles and make them easier to vacuum up. Be sure to cover the entire floor, paying extra attention to high-traffic areas and corners.
Next, use the high-powered vacuum cleaner with the HEPA filter to thoroughly vacuum the floor. Pass over the same area multiple times to ensure complete removal of dust and carpet fibers. Avoid scrubbing motions that can push the dust deeper into the carpet fibers.
By following these instructions and using a vacuum cleaner with a HEPA filter, you can effectively remove dust and carpet fibers from your vinyl flooring. This will help create a clean surface before dealing with the drywall mud, ensuring a successful cleaning process.
Wipe Down the Vinyl with a Damp Cloth to Remove Any Residue or White Spots
After vacuuming and removing the majority of the drywall mud from the vinyl flooring, it’s essential to wipe down the surface with a damp cloth to eliminate any remaining residue or white spots.
To begin, grab a clean cloth and dampen it slightly with water. It’s crucial to ensure that the cloth is only slightly damp and not soaking wet. Excess water can potentially damage the vinyl flooring.
Gently wipe down the entire floor, focusing on areas with visible residue or white spots. The moisture from the damp cloth will help loosen and lift any remaining drywall mud from the vinyl surface.
For stubborn spots, apply a bit more pressure and use a soft-bristled brush to gently scrub the area. Be careful not to scrub too aggressively, as this can cause damage to the vinyl.
After wiping and scrubbing the affected areas, use a clean and dry cloth or paper towel to remove any excess moisture from the floor.
By following these steps and using a damp cloth, you can effectively remove any residue or white spots left behind by drywall mud on your vinyl flooring.
Removing Drywall Mud from Vinyl Flooring
Drywall mud can be a pesky problem when it comes to vinyl flooring. Fortunately, with the right techniques and tools, getting rid of drywall mud from vinyl flooring can be a straightforward process. In this guide, we will discuss effective methods and precautions to help you remove drywall mud from your vinyl flooring without causing any damage.
1. Prepare the area:
Before you begin, make sure to clear the area of any furniture or obstacles to avoid any unnecessary complications or damage. Lay down a drop cloth to protect the surrounding areas.
2. Dust off the floor:
Use a vacuum cleaner with a brush attachment to remove any loose dust particles or drywall dust from the floor. If you do not have access to a vacuum cleaner, you can use a broom or a soft-bristled brush to sweep away the dust.
3. Mix warm water with mild detergent:
In a bucket, mix warm water with a few drops of mild detergent. It is important to use warm water, as it helps to loosen and dissolve the drywall mud more effectively.
4. Clean the affected areas:
Dampen a soft cloth or a microfiber cloth with the warm soapy water solution. Gently wipe down the affected areas of the vinyl flooring, focusing on the spots with drywall mud. Avoid scrubbing too vigorously as this can damage the vinyl.
5. Remove stubborn spots:
For more stubborn spots or dried-on mud, use a plastic putty knife or a damp sponge along with the warm soapy water solution to carefully scrape or rub away the mud. Be cautious not to scratch or damage the vinyl surface.
6. Rinse and dry:
Once you have successfully removed the drywall mud, rinse the floor with clean water to ensure all the detergent is removed. Dry the floor thoroughly using a clean cloth or paper towel to prevent any moisture-related issues.
By following these steps and using caution, you can effectively remove drywall mud from your vinyl flooring and restore its clean and smooth appearance.
Using a Warm Water and Microfiber Cloth Solution
When it comes to removing drywall mud from vinyl flooring, using a warm water and microfiber cloth solution can be highly effective. To create this solution, start by mixing warm water with a few drops of mild detergent in a bucket. The warm water helps to loosen and dissolve the drywall mud more effectively.
Once you have your solution ready, dampen a microfiber cloth with it and begin gently wiping down the affected areas of the vinyl flooring. Focus on the spots with drywall mud, using a circular motion to lift and remove the mud from the surface. For stubborn stains, apply a bit of elbow grease and use a soft-bristled brush to scrub the area. Be careful not to use excessive force as this can damage the vinyl.
Continue working your way through the affected areas, reapplying the warm water and detergent solution as needed. Once you have successfully removed the drywall mud, rinse the floor with clean water to ensure all the detergent is removed. Finally, dry the floor thoroughly with a clean microfiber cloth or paper towel to prevent any moisture-related issues.
Using a warm water and microfiber cloth solution is a safe and effective method for removing drywall mud from vinyl flooring. This technique helps to protect the vinyl while effectively removing the stubborn mud stains.
Scrubbing the Areas with Elbow Grease and Soft-Bristled Brush
To scrub away drywall mud from vinyl flooring, it’s crucial to use elbow grease and a soft-bristled brush. This method helps remove stubborn stains without damaging the vinyl surface.
Start by applying a combination of warm water and a mild cleaning solution to the affected areas. Then, use a soft-bristled brush to gently scrub the drywall mud. Remember to avoid using excessive force, as it can cause damage to the vinyl. Instead, apply steady pressure and scrub in circular motions for effective results.
The soft bristles of the brush are important because they are less likely to scratch or scuff the vinyl flooring. This ensures that you can remove the drywall mud without leaving any additional marks or damage behind.
As you work your way through the affected areas, periodically rinse the brush and reapply the cleaning solution as needed. Continue scrubbing until the drywall mud is fully removed.
After successfully scrubbing away the mud, rinse the floor with clean water to remove any remaining residue. Finally, dry the vinyl thoroughly with a clean microfiber cloth or paper towel to prevent any moisture-related issues.
By using elbow grease and a soft-bristled brush, you can effectively remove drywall mud from vinyl flooring without causing any damage.
Cleanup Process
Cleaning up drywall mud off vinyl flooring can be a challenging task, but with the right techniques, it can be accomplished effectively. Whether you’re dealing with a small spill or a large area covered in drywall mud, there are steps you can take to remove it without causing more damage to your vinyl. In this article, we will explore the best practices for cleaning up drywall mud from vinyl flooring, including the materials you’ll need and the step-by-step process for a successful cleanup.
By following these instructions, you can restore the pristine condition of your vinyl floor and ensure its longevity.
Removing Dirt Particles and Dust from Drywall Mud
Keeping your vinyl flooring clean and free from dirt particles and dust is essential for maintaining its appearance and longevity. This is particularly important when it comes to removing drywall mud, as it can leave behind stubborn residue if not properly cleaned. Follow these steps to effectively remove dirt particles and dust from drywall mud on vinyl flooring:
1. Start by using a vacuum cleaner with a HEPA filter to remove loose dirt and dust from the surface. This is important as it helps prevent particles from scratching or damaging the vinyl flooring.
2. For any remaining drywall mud residue, prepare a cleaning solution by mixing warm water with a small amount of mild detergent. Avoid using abrasive cleaners as they can damage the vinyl.
3. Dampen a clean cloth or microfiber cloth with the cleaning solution and gently scrub the affected areas. Ensure not to oversaturate the cloth, as excessive moisture can seep into the vinyl and cause damage.
4. For stubborn residue, use a soft-bristled brush to lightly scrub the area in a circular motion. Be cautious not to scrub too vigorously, as this can scratch the vinyl surface.
5. After removing the drywall mud, rinse the floor with clean water to remove any soap residue. Use a soft, damp cloth or sponge to wipe away any remaining dirt or cleaning solution.
Remember to test any cleaning products or methods on a small, inconspicuous area of the vinyl flooring before applying them to the entire floor. This will help ensure that the cleaning process does not cause any adverse effects, such as discoloration or damage.
Vacuuming with Regular Vacuum or Specialized Vacuum Cleaner
When it comes to vacuuming drywall mud off vinyl flooring, you have a couple of options: using a regular vacuum or a specialized vacuum cleaner. Here are the steps to effectively vacuum drywall mud using either method:
1. Begin by removing any loose dirt and debris from the vinyl flooring. Use a broom or dustpan to sweep away larger particles before vacuuming.
2. If you’re using a regular vacuum, make sure it has a strong suction power and a sturdy brush attachment. This will help to effectively pick up drywall mud from the vinyl surface.
3. For a more thorough and efficient cleaning, consider using a specialized vacuum cleaner specifically designed for construction cleanup. These vacuums typically come with a heavy-duty HEPA filter, which is crucial for trapping small dust particles and preventing damage to the vacuum’s motor.
4. Use a wide shop vac attachment for vacuuming drywall mud off the vinyl flooring. This attachment has a wider mouth, allowing it to cover more surface area and pick up larger debris, including drywall mud.
5. If you don’t have a specialized vacuum cleaner, you can rent one from home improvement stores. These rental vacuums are often of higher quality and equipped with more powerful suction, making the task of vacuuming drywall mud much easier.
By following these steps and using either a regular vacuum with a sturdy brush attachment or a specialized construction vacuum with a heavy-duty HEPA filter, you can effectively remove drywall mud from your vinyl flooring without causing any damage.
In Conclusion:
When it comes to removing drywall mud from vinyl flooring, it is important to take the proper steps to ensure that the surface is not damaged. Start by using a vacuum cleaner with a HEPA filter to remove loose dirt and dust particles. For any remaining residue, prepare a cleaning solution of mild detergent and warm water and gently scrub the affected areas with a cloth or microfiber cloth.
For tougher residue, use a soft-bristled brush to lightly scrub the area in a circular motion. Finally, rinse the floor with clean water and use a damp cloth or sponge to wipe away any remaining dirt or cleaning solution. By following these steps, you can easily and safely remove drywall mud from vinyl flooring.