Vinyl Flooring Fixes: Your Comprehensive Guide To Repair And Maintenance
Your vinyl flooring can stay gorgeous and durable with the right care. Discover how to prevent scratches, bubbles, and other common issues, plus when to seek professional help for the best results.
Are you tired of looking at the scratches and scuffs on your vinyl flooring? Do you dread the thought of calling a professional to fix it? Well, fear not!
With this comprehensive guide to vinyl flooring repair and maintenance, you can save money and time by fixing it yourself.
In this guide, we will cover everything from fitting vinyl flooring to common issues you may encounter and how to fix them. You’ll also learn how to properly maintain your vinyl flooring to ensure it lasts for years to come.
So, get ready to roll up your sleeves and take on those vinyl flooring fixes with confidence!
Key Takeaways
- Properly preparing the subfloor is crucial for successful vinyl flooring installation.
- Common issues with vinyl flooring include scratches, bubbles, bumps, and peeling, but there are fixes available for each.
- Regular maintenance and preventative measures, such as furniture pads and avoiding harsh chemicals, can prevent issues like expansion, contraction, and warping.
- Seeking professional help is important for deep scratches, water damage, mold or mildew growth, and installation errors.
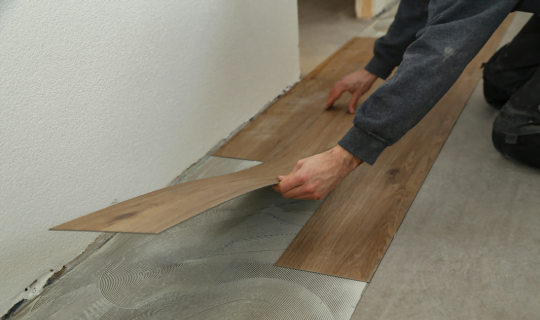
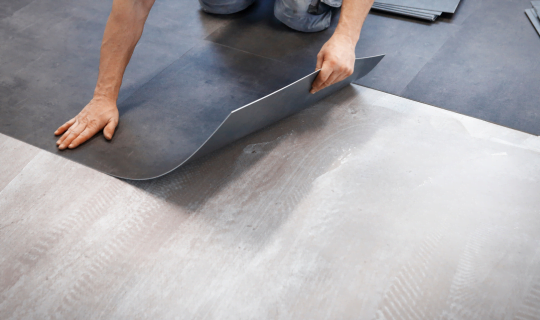
How to Fit Vinyl Flooring
If you’re new to vinyl flooring installation, don’t worry – it’s easier than you might think! Before you begin, make sure to have all necessary tools and materials on hand. This includes a tape measure, utility knife, straight edge, and adhesive. It’s also a good idea to read the manufacturer’s installation instructions, as they may have specific requirements or recommendations for your particular type of vinyl floor.
When it comes to vinyl flooring, there are two main types of installation: glue-down and click-lock. Glue-down vinyl floor is adhered directly to the subfloor with adhesive, while click-lock vinyl plank flooring snaps together without the need for adhesive. The following table breaks down the main differences between the two types of vinyl flooring installation:
| Glue-Down Vinyl Floor | Click-Lock Vinyl Plank Flooring |
|---|---|
| Requires adhesive to attach to subfloor | Snaps together without adhesive |
| More difficult to remove and replace | Easy to install and remove |
| Better for high-traffic areas or moisture-prone spaces | Good for DIY installation |
| May require a professional installer | Can be installed over existing flooring |
No matter which type of vinyl floor you choose, always make sure to properly prepare the subfloor by ensuring it is clean, dry, and level. With the right tools, materials, and preparation, you’ll be on your way to a beautiful and durable vinyl floor in no time!
Step-by-step guide to fitting vinyl flooring
To achieve a flawless result in fitting luxury vinyl plank flooring, you’ll need to have the right tools and materials on hand. You’ll need a floor scraper, a vinyl seam sealer, a utility knife, a straight edge, a measuring tape, a chalk line, and a roller. It’s also important to have a clean and level subfloor.
Before installing the vinyl flooring, remove any existing flooring and debris. Use the floor scraper to remove any adhesive residue and make sure the subfloor is smooth and even.
Once you have your tools and a clean subfloor, it’s time to start fitting the vinyl flooring. Begin by laying out the vinyl planks in the room, making sure to stagger the seams for a natural look. Use the straight edge and utility knife to cut the planks to fit around any obstacles.
Apply the vinyl seam sealer to the seams between the planks to ensure a water-tight seal. Use a roller to press the planks firmly into place and eliminate any air bubbles.
With these steps, you’ll be able to fit your luxury vinyl plank flooring with ease and achieve a stunning result.
Tips for a successful installation
Achieving a flawless installation of luxury vinyl plank requires more than just the right tools; here are some tips to ensure success. First, make sure to properly prepare the subfloor by cleaning it thoroughly and ensuring it is level. Any bumps or dips in the subfloor can cause issues with the installation, so it’s important to take the time to get it right. Additionally, make sure to acclimate the vinyl flooring to the room’s temperature and humidity before installation, as this can prevent issues with expansion or contraction later on.
Another important tip is to use basic tools and equipment, such as a utility knife, straight edge, and measuring tape. While there are specialized tools available for vinyl flooring installation, these basic tools are often all that’s needed. When installing sheet vinyl, pay special attention to the seams. Overlapping the sheets can cause bumps or tears in the vinyl, so it’s important to carefully align and butt the seams together. By following these tips and taking the time to properly install your vinyl flooring, you can ensure it looks great and lasts for years to come.
| Vinyl Floor Scratch Repair | Basic Tools | Seams in Sheet Flooring |
|---|---|---|
| Use a vinyl repair kit or filler to fix scratches or gouges | Utility knife, straight edge, measuring tape | Carefully align and butt seams together to prevent bumps or tears |
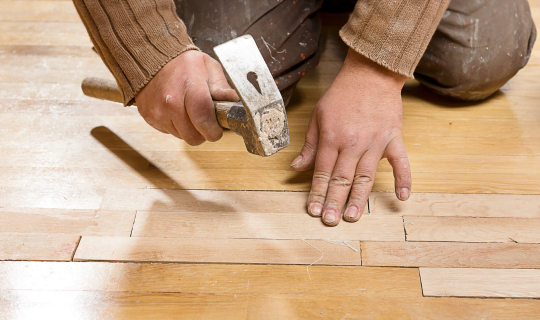
Common Issues with Vinyl Flooring and How to Fix Them
Vinyl flooring has become a popular choice for homeowners due to its durability, versatility, and affordability. However, like any other type of flooring, it is not immune to its fair share of issues. From scratches and stains to buckling and peeling, vinyl floors can present a range of problems that require attention and resolution. In this guide, we will explore some of the most common issues encountered with vinyl flooring and provide practical solutions to help you tackle them effectively. Whether you are a DIY enthusiast or seeking professional assistance, this comprehensive overview will equip you with the knowledge and strategies needed to restore the beauty and functionality of your vinyl floors.
Air pockets under vinyl flooring
You may notice air pockets forming under your vinyl flooring, causing it to bulge and become unstable. This can happen due to a variety of reasons, such as improper installation, uneven subfloor, or moisture buildup.
To fix this issue, you’ll need a utility knife, extra flooring material, and some patience. Follow these steps:
- Locate the air pocket by pressing down on the flooring and looking for areas that give way.
- Use the utility knife to make a small slit in the center of the air pocket.
- Gently lift the edges of the vinyl and inject adhesive underneath using a syringe.
- Press down on the vinyl to flatten it and remove any excess adhesive.
To prevent air pockets from forming in the future, ensure that the subfloor is level and dry before installation, use a proper adhesive, and avoid dragging heavy furniture across the floor.
If you need further assistance with vinyl floor scratch repair or other maintenance issues, consult a professional.
Bubbles in vinyl flooring
A pristine vinyl floor can be marred by the unsightly presence of bubbles, which can cause discomfort every time you step on them. Bubbles in vinyl flooring come into existence when air becomes trapped between the adhesive and the subfloor, either during the installation process or due to subsequent moisture issues.
However, the good news is that dealing with them isn’t an insurmountable task. The steps are as follows:
- Puncture the Bubble: Begin by using a needle to pierce the bubble, allowing the trapped air to escape.
- Apply Pressure: Next, flatten the vinyl by applying pressure to the punctured bubble. You can use a heavy object or a rolling pin to accomplish this.
- Replace the Affected Area: If the bubble is overly large, or if multiple bubbles have appeared, it may be necessary to replace the affected area of the flooring.
To maintain the integrity of your vinyl flooring, it’s crucial to implement preventive measures against the formation of bubbles. Here are some important steps:
- Ensure a Dry and Level Subfloor: Before installing the vinyl, make certain that the subfloor is both dry and level.
- Use Appropriate Adhesive: Utilize an adhesive that’s specifically recommended for vinyl flooring.
By incorporating these simple steps into your flooring installation and maintenance practices, you can effectively prevent and rectify bubbles in your vinyl flooring, keeping it attractive and functional for many years.
Bumps in vinyl flooring
These are another common issue that can mar the smooth appearance of your vinyl flooring, following bubbles. There are several reasons why these pesky bumps may appear, including improper installation, moisture damage, or the influence of heavy furniture. The good news is that addressing bumps can be as straightforward as dealing with bubbles, often requiring similar methods.
To help you understand how to fix bumps in your vinyl flooring, let’s look at the following list detailing each step involved:
- Identify the cause of the bumps: As mentioned earlier, the reasons for bumps can vary, so pinpointing the source can assist you in implementing the right solution. For example, heavy furniture might need relocating, or moisture issues might necessitate more comprehensive repairs.
- Prepare your tools and materials: Based on the cause, gather all the necessary tools and materials for the repair. This could include a vinyl floor roller, seam sealer, or patching compound.
- Perform the repairs: Proceed with the appropriate steps to fix the bumps. You may need to roll the floor to remove air pockets, seal seams to prevent moisture seepage, or fill in areas with a patching compound.
- Let the repairs set: Give enough time for the repairs to fully set before using the floor again. The required duration can depend on the type of repair and the products used.
- Maintain your vinyl flooring: Regular maintenance is the key to prevent further bumps or other issues with your vinyl flooring. This involves regular cleaning and the prevention of dragging heavy objects across the floor.
By following these steps, you can ensure the longevity of your vinyl flooring, keeping it smooth and attractive for years to come.
Dents in vinyl flooring
Got a pesky dent in your vinyl flooring? Don’t worry, it’s a common issue that can be easily fixed with a few simple steps. Here’s what you need to do:
- Heat it up: Use a hairdryer or heat gun to warm up the dented area. This will soften the vinyl and make it more pliable.
- Fill it in: Once the vinyl is warm, use a putty knife or spatula to fill in the dent with a vinyl floor filler. Make sure to smooth it out evenly and let it dry completely.
- Sand it down: Once the filler is dry, use sandpaper to smooth out the surface until it’s level with the surrounding vinyl.
- Clean it up: Use a damp cloth to wipe away any dust or debris from sanding.
- Prevent future dents: To prevent dents in the future, be sure to avoid dragging heavy furniture across the vinyl and use furniture pads under the legs of your furniture.
By following these simple steps, you can easily fix any dents in your vinyl flooring and keep it looking great for years to come. Remember, regular maintenance is key to keeping your floors in top condition!
Gaps in vinyl flooring
It can be managed and prevented by understanding their causes and implementing effective measures. Here is a step-by-step approach:
- Identify the Cause: Gaps in vinyl flooring typically arise from temperature and humidity fluctuations leading to the material’s expansion and contraction. So, begin by spotting the cause of these gaps.
- Apply a Fix: Once you’ve identified the issue’s cause, your next move is to rectify it. The use of a seam sealer can effectively address these gaps. It can be applied to the problem area to fill in the gaps and produce a smooth, uniform surface.
- Maintain Consistent Room Conditions: For future prevention of gaps, ensure the room housing your vinyl flooring maintains a stable temperature and humidity level. The use of a dehumidifier or a humidifier, tailored to your space’s specific needs, can help maintain these conditions.
- Limit Water Exposure: It’s vital to prevent your vinyl flooring from excessive water exposure, as this can lead to warping and buckling over time.
By following these steps, you can effectively fix existing gaps and deter future ones, ensuring that your vinyl flooring remains in excellent condition for the foreseeable future.
Holes in vinyl flooring
If you’ve discovered small holes or punctures in your vinyl flooring, don’t panic. There are straightforward methods to patch them up and prevent future damages. Follow these steps to ensure your vinyl floors regain their pristine condition:
- Fill the hole with adhesive: Using a putty knife, fill the hole with sheet flooring adhesive. Ensure you smooth it out and let it dry entirely before proceeding to the next step.
- Apply a second layer of adhesive: Once the first layer is dry, it’s time to apply a second layer of adhesive. Be sure to cover the edges of the first layer to guarantee a strong bond.
- Scrape off excess adhesive: After the second adhesive layer has dried, use your putty knife to scrape off any excess adhesive.
In addition to these repair steps, there are certain preventative measures you can take to avoid future damage:
- Avoid dragging heavy furniture across the floor: This is one of the primary causes of holes and scratches in vinyl flooring.
- Use felt pads under furniture legs: Placing felt pads under the legs of your chairs and tables can greatly reduce the risk of puncturing or scratching the floor.
By following these tips and guidelines, your vinyl floors will be back to looking as good as new in no time!
Lifting Vinyl Flooring
Don’t let your beautiful floors go to waste – with a little know-how, you can easily tackle the issue of lifting vinyl flooring and keep your space looking polished and inviting.
Lifting vinyl flooring is a common problem, and it can happen due to various reasons such as improper installation, exposure to moisture, improper subfloor preparation, and heavy traffic.
Here are steps to fix lifting vinyl flooring:
- Identify the Problem: Start by identifying the cause of the problem. This could be any number of issues, including improper installation, exposure to moisture, poor subfloor preparation, or heavy traffic.
- Remove the Damaged Section: Once you’ve identified the issue, remove the damaged section of the flooring. Be careful not to damage the surrounding area.
- Clean the Subfloor: Thoroughly clean the subfloor, making sure to remove any dirt, debris, or leftover adhesive. This ensures a smooth surface for the new flooring to adhere to.
- Replace the Vinyl: Lastly, install the new vinyl. Make sure to use the right adhesive and follow the manufacturer’s instructions to ensure a secure fit.
Prevention is always better than cure. Follow these tips to prevent lifting vinyl flooring in the future:
- Choose High-Quality Vinyl: High-quality vinyl is less likely to lift and can withstand more wear and tear.
- Properly Prepare the Subfloor: A clean, level subfloor is key to a successful installation. Make sure to remove any debris and ensure the subfloor is completely dry before beginning installation.
- Use the Right Adhesive: Different types of vinyl require different adhesives. Make sure to use the one recommended by the vinyl manufacturer.
- Avoid Excessive Moisture and Heavy Appliances: Exposing the floor to excessive moisture can lead to lifting. Similarly, heavy appliances can put too much strain on the flooring, causing it to lift.
By following these simple steps and preventative measures, you can ensure that your beautiful vinyl floors stay in good condition for years to come.
Loose vinyl flooring
At times, you might find your once flawless flooring feeling unstable and making disconcerting sounds underfoot. The reason might be loose vinyl flooring, a situation that should be addressed quickly before it evolves into a tripping hazard.
Loose vinyl flooring happens when the glue or adhesive, which binds the vinyl to the subfloor, starts to deteriorate or lose its grip. If you come across such a situation, here’s what you need to do:
- Identify the affected vinyl tiles or planks.
- Remove these tiles or planks carefully.
- Clean the subfloor and apply fresh adhesive.
- Reinstall the tiles or planks, ensuring they adhere to the subfloor properly.
To prevent loose vinyl flooring from happening initially, follow these steps:
- Use high-quality adhesive during the installation process to ensure a stronger bond.
- Avoid the usage of water or harsh chemicals while cleaning your vinyl flooring. These can deteriorate the adhesive over time.
- Be careful about placing heavy furniture or appliances on your vinyl flooring. Excessive weight can put undue stress on the vinyl flooring, causing it to loosen over time.
By implementing these preventative measures and addressing loose vinyl flooring promptly, you can ensure your floors remain stable, safe, and maintain their appeal for years to come.
Peeling vinyl flooring
When peeling vinyl flooring begins to occur, it’s time to take action and prevent further damage to your floors. Peeling can happen due to a variety of reasons, such as moisture, improper installation, or wear and tear. To fix peeling vinyl flooring, you’ll need to first identify the cause and then take appropriate action. If it’s due to moisture, make sure to address any leaks or humidity issues. If it’s due to improper installation, you may need to seek professional help to re-install the flooring. To prevent peeling in the future, make sure to keep your floors clean and dry, avoid using harsh chemicals, and follow proper installation guidelines. Use the following table to understand the potential consequences of neglecting your peeling vinyl flooring and take action to protect your floors today.
| Neglecting Peeling Vinyl Flooring | Consequences |
|---|---|
| Ignoring the problem | Can lead to further damage and more costly repairs |
| Continuing to walk on peeling flooring | Can cause tripping hazards and injury |
| Allowing moisture to persist | Can lead to mold and mildew growth |
| Not addressing the cause | Will result in the problem recurring |
| Not taking preventative measures | Will result in future peeling and damage |
Ripped vinyl flooring
This kind of damage can occur due to various factors, including high traffic, shifting furniture, or exposure to sharp objects.
However, rest assured that the solution isn’t as complex as it may initially appear. Here are the steps to follow:
- Begin by cleaning the area around the rip. Use soap and water to ensure it’s completely free of dust and grime. Allow the cleaned area to dry fully before proceeding to the next step.
- Apply a specialized vinyl adhesive underneath the ripped portion. Ensure that the adhesive covers the entire damaged area for maximum grip.
- Press down firmly on the area where you’ve applied the adhesive. It’s essential to ensure the vinyl sticks well to the adhesive for a solid repair.
- Place a heavy object, such as a book or a flat weight, over the repaired section to help the vinyl bond securely with the adhesive. Keep the weight on for at least 24 hours to allow the adhesive to dry properly.
Taking care of your vinyl flooring doesn’t stop at repairs, though. Prevent future rips from occurring by not dragging heavy furniture across your flooring. Instead, lift and move items or use furniture pads. By adhering to these guidelines, you can extend the lifespan of your vinyl flooring, maintaining its fresh, appealing look for years to come.
Taking Care of Scratches on Vinyl Flooring
Scratches on vinyl flooring can be a common occurrence, especially in areas of high foot traffic. There’s no need for alarm, though, as several solutions exist for tackling this issue effectively.
Repairing Vinyl Flooring Scratches: Step-by-Step
- Clean the Scratched Area: Begin by thoroughly cleaning the scratched part of your vinyl flooring. Use a soft cloth and a gentle cleaner. Make sure not to soak the area, as excessive moisture can damage vinyl flooring.
- Repair the Scratch: Use a vinyl flooring repair kit for the next step. These kits usually come with a putty or filler that you can use to fill the scratch. Smooth out the putty or filler so it’s flush with the rest of the flooring.
- Replace Deeply Scratched Tiles or Planks: If the scratch on your vinyl flooring is too deep, you may need to consider replacing the damaged tile or plank. Make sure to follow the manufacturer’s instructions for replacement to ensure a seamless fit.
Preventing Future Scratches on Vinyl Flooring
To maintain your vinyl flooring in the best condition possible, consider implementing the following precautions:
- Use Furniture Pads: Place furniture pads under the legs of all your furniture. This will help distribute the weight and reduce the risk of scratches when furniture is moved around.
- Beware of Certain Footwear: High heels and cleats can create punctures or scratches on vinyl flooring. To preserve your floor’s smooth finish, avoid wearing these types of shoes indoors.
- Regular Cleaning: Regularly sweeping or vacuuming your floor can help keep it free from debris. Dust and small particles can act like sandpaper underfoot, causing small scratches over time. Regular cleaning can prevent this damage.
With a little maintenance, your vinyl flooring can look like new for many years to come.
Preventing and Fixing Separation in Vinyl Flooring
Separation in vinyl flooring is a common problem faced by homeowners. It occurs when the adhesive bonding the planks or tiles to the subfloor weakens or sustains damage. However, you can take proactive measures to prevent this issue or fix it if it has already taken place. Here are some steps you can take:
- Regular Inspection: Regularly check the edges of your vinyl flooring for any signs of lifting. This can help you catch and fix issues early before they exacerbate.
- Removing the Separated Piece: If a plank or tile has already separated, you’ll need to remove it. Ensure you do this carefully to avoid causing further damage to the surrounding flooring.
- Cleaning: Once the separated piece is removed, it’s essential to clean both the subfloor and the back of the vinyl flooring thoroughly. This will ensure the new adhesive can bond effectively.
- Re-Adhering: Apply a new layer of high-quality adhesive specifically designed for vinyl flooring to ensure a robust bond.
- Ensure a Level and Dry Subfloor: Before the installation of your vinyl flooring, it’s crucial to ensure that your subfloor is level and dry. A subfloor that isn’t level or has moisture can lead to separation in the future.
- Furniture Placement: Avoid placing heavy furniture or appliances on the vinyl flooring. Excessive weight can damage the flooring and lead to separation.
- Regular Maintenance: Regular cleaning and debris removal are vital. Any moisture or debris can degrade the adhesive over time, leading to separation. Proper maintenance extends the life of your vinyl flooring and helps maintain its aesthetics and functionality.
By following these steps, you can not only fix the existing separation in your vinyl flooring but also prevent future issues. This way, you can enjoy the beauty and durability of your vinyl floor for years to come.
Warped vinyl flooring
Picture this: your once smooth and flawless floor has now become a bumpy, uneven terrain, making it difficult to walk on without tripping – this is the result of warped vinyl flooring. Not only is it unsightly, but it can also cause safety hazards.
Fortunately, there are ways to fix and prevent warped vinyl flooring. Here are some tips:
1) Fixing warped vinyl flooring can be done by cutting a small slit in the flooring where it is warped and using a heat gun to soften the vinyl, allowing it to be flattened out.
2) To prevent this from happening, ensure proper installation by leaving enough space for the flooring to expand and contract, and avoid overexposure to direct sunlight and extreme temperature changes.
3) Another way to prevent warping is to use a humidifier during the dry winter months.
4) Lastly, regular maintenance such as cleaning and sweeping can help prevent dirt and debris from accumulating, which can cause the vinyl to warp over time.
By following these tips, you can avoid the headache of warped vinyl flooring and maintain a smooth and safe walking surface.
Maintaining Your Vinyl Flooring
To keep your vinyl flooring looking its best, regular maintenance is key. This includes sweeping or vacuuming the floors regularly to remove dirt and debris. It’s also important to wipe up spills as soon as they happen. To prevent common issues like scratches and scuffs, you can use felt pads on furniture legs and avoid wearing high heels or shoes with sharp heels on the floors.
However, if you do experience any major issues with your vinyl flooring, it’s important to seek professional help to ensure the problem is properly addressed.
Tips for regular maintenance
Maintaining your vinyl flooring is easy and essential, and you’ll want to make sure you’re doing everything you can to keep it in good condition. Here are some tips for regular maintenance that will help keep your vinyl flooring looking great for years to come:
- Sweep or vacuum your vinyl flooring regularly to prevent dirt and debris from building up and scratching the surface.
- Use a damp mop and mild cleaner to clean your vinyl flooring as needed. Avoid using harsh chemicals or abrasive cleaners that could damage the surface.
- Apply an acrylic finish to your vinyl flooring in high-traffic areas to protect it from wear and tear. This will help extend the life of your flooring and keep it looking new.
- Avoid using rubber-backed mats or rugs on your vinyl flooring, as they can cause discoloration and damage over time. Instead, use mats or rugs made from natural fibers or a non-staining vinyl material.
By following these tips for regular maintenance, you can help ensure that your vinyl flooring stays in great condition for years to come. With just a little bit of effort, you can keep your flooring looking new and beautiful, even in high-traffic areas.
How to prevent common issues
Want to avoid common problems with your vinyl floors? Here’s how!
First, make sure to clean up any spills or messes immediately, as leaving them for too long can cause stains or damage to your floors. Use a soft, damp cloth to wipe up spills, and avoid using harsh chemicals or abrasive materials that can scratch or dull the surface of your vinyl flooring.
Another way to prevent common issues with vinyl flooring is to use furniture pads or felt protectors on the legs of your furniture. This will prevent scratches and scuffs from occurring when moving furniture around. Additionally, avoid dragging heavy objects across your vinyl floors, as this can also cause damage.
Finally, if you’re installing vinyl flooring yourself, make sure to use a high-quality, resilient flooring adhesive to ensure that your floors stay in place and don’t peel up over time.
By following these tips, you can keep your vinyl floors looking great for years to come!
When to seek professional help
If you’re facing stubborn issues with your vinyl floors, it may be time to call in the professionals. Some maintenance tasks are easy to handle on your own, but there are certain problems that require specialized knowledge and tools.
Here are some situations where you should seek professional help for your vinyl flooring fixes:
- Deep scratches or dents that have penetrated the wear layer of the vinyl
- Extensive water damage that has caused warping or buckling
- Mold or mildew growth that has spread beyond a small, isolated area
- Installation errors that have caused gaps, bubbles, or other structural issues
Trying to tackle these problems yourself could make the situation worse and end up costing you more in the long run. By reaching out to a qualified flooring technician, you can ensure that your vinyl floors are repaired correctly and efficiently. Plus, you’ll have the peace of mind that comes with knowing your floors are in good hands.
So, don’t hesitate to seek professional help when it comes to your vinyl flooring maintenance. When it comes to vinyl flooring fixes, it’s always better to be safe than sorry. While some issues can be resolved with a DIY approach, others require the expertise of a professional.
By being aware of when to seek help, you can ensure that your vinyl floors remain in top condition for many years to come. Remember, regular maintenance and timely repairs are key to keeping your floors looking their best. So, make sure to take care of your vinyl floors and don’t hesitate to call in the pros when needed.
Frequently Asked Questions
Conclusion
Congratulations! You’ve successfully installed vinyl flooring in your space. But the work doesn’t end there. Regular maintenance is necessary to keep your floors looking their best. Thankfully, with proper care, your vinyl flooring can last for years to come.
To keep your floors clean, sweep or vacuum regularly to remove loose dirt and debris. Wipe up spills immediately to prevent stains, and use a damp mop with a mild cleaning solution to tackle dirt and grime. Avoid using abrasive cleaners or scrubbers that can damage the surface of your floors. And remember to protect your floors from scratches by placing felt pads under furniture legs and using rugs in high-traffic areas.
If you encounter any issues with your vinyl flooring, such as tears or bubbles, don’t panic. These are common issues that can be easily fixed with some simple DIY techniques. Whether you need to patch a tear or flatten a bubble, there are plenty of solutions available. And if you’re not comfortable tackling the issue yourself, there are professionals who can assist you.
By following these tips and tricks, your vinyl flooring will remain beautiful and functional for years to come. So sit back, relax, and enjoy your stylish and durable floors!