Mastering Vinyl Floor Cleaning: How to Remove Ground-In Dirt
Struggling with ground-in dirt on your vinyl flooring? Our detailed guide offers effective cleaning techniques to restore your floor’s shine. Improve air quality, enhance aesthetics, and extend the lifespan of your vinyl floors.
Key Takeaways
- Vinyl flooring, popular for its affordability and durability, can accumulate ground-in dirt that requires targeted cleaning methods.
- Cleaning vinyl flooring not only enhances its appearance but also improves indoor air quality by reducing dust and allergens.
- To remove ground-in dirt, use a cleaning solution designed for vinyl floors and a soft-bristled brush to gently scrub away the embedded dirt.
- After scrubbing, rinse the floor with clean water, remove any residue, and let it air dry or use a clean, dry mop or towel to remove excess moisture.
- Regular maintenance, including sweeping, vacuuming, and deep cleaning as needed, will help keep your vinyl flooring in pristine condition.
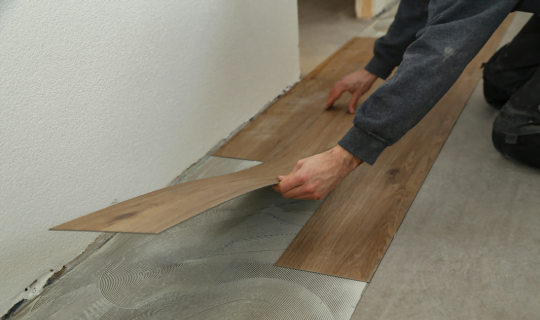
What is vinyl flooring?
Vinyl flooring is a popular choice for many homeowners due to its affordability, durability, and low maintenance needs. Made primarily from PVC (polyvinyl chloride), vinyl flooring is available in a variety of styles and designs, including options that mimic the appearance of hardwood, stone, or tile. This versatile flooring option is relatively easy to install and is often used in high-traffic areas such as kitchens, bathrooms, and entryways.
Vinyl flooring is highly resistant to stains, water, and scratches, making it a practical choice for households with children or pets. With proper care and maintenance, vinyl flooring can last for many years, providing a stylish and attractive flooring solution for any home.
What is ground in dirt?
Ground-in dirt refers to dirt particles that have become embedded in the surface of vinyl flooring. It occurs when loose dirt is not promptly removed and instead, over time, becomes compacted within the indentations and crevices of the textured vinyl surface. This can result in a layer of dirt that is difficult to remove with regular cleaning methods.
The textured surface of vinyl flooring provides an ideal environment for dirt particles to become trapped and stuck. Regular mopping or sweeping may not be enough to effectively remove this ground-in dirt, as it has become stubbornly adhered to the surface. This can leave the floor looking dull and dirty, even after cleaning.
To remove ground-in dirt from vinyl flooring, a more thorough and targeted cleaning method is needed. This can involve using a cleaning solution specifically designed for vinyl floors, along with a soft-bristled brush to gently scrub away the embedded dirt. Warm water mixed with a mild floor cleaner or a mix of warm water and white vinegar can be effective in breaking down the dirt particles and loosening them from the surface.
After scrubbing, it is important to rinse the floor with clean water to remove any residue. Finally, allow the floor to air dry or use a clean, dry mop or towel to remove excess moisture. By utilizing these techniques, you can successfully remove ground-in dirt from your vinyl flooring and restore its cleanliness and shine.
Benefits of Cleaning Vinyl Flooring
Cleaning vinyl flooring not only improves the overall appearance of a room, but it also offers several other benefits that can greatly enhance the living environment. One of the key advantages of maintaining clean vinyl floors is the positive impact it has on air quality. Over time, dust, dirt, and allergens can accumulate on the floor, especially in high-traffic areas. Regular cleaning helps to remove these particles, reducing the amount of airborne allergens and improving indoor air quality.
In addition to improving air quality, cleaning vinyl flooring also enhances the aesthetic appeal of a room. When floors are properly maintained and free from dirt and stains, they create a more inviting and well-kept atmosphere. Whether it’s the kitchen, bathroom, or any other space, clean floors contribute to a brighter and more visually appealing environment.
Vinyl floors are known for their durability and resistance to moisture, which makes them an excellent choice for areas prone to spills and high humidity. By regularly cleaning and caring for vinyl floors, you can extend their lifespan and protect them from potential damage caused by dirt and moisture.
Preparation
Preparation is key when it comes to effectively removing ground-in dirt from vinyl flooring. Before starting the cleaning process, it is important to gather all the necessary supplies. This includes a soft-bristled brush or mop, a bucket of warm water, a cleaning solution specifically made for vinyl floors or a homemade solution using mild dish soap, and a clean cloth or sponge. It is also helpful to remove any loose dirt and dust particles from the floor surface by sweeping or vacuuming beforehand.
Additionally, check the manufacturer’s guidelines for any specific cleaning recommendations or restrictions for your particular type of vinyl flooring. Taking the time to properly prepare will ensure that you have everything you need to achieve the best cleaning results.
Clear the Room
Before embarking on the task of cleaning your vinyl flooring, it is essential to clear the room of any furniture or objects. This seemingly simple step can greatly impact the effectiveness and efficiency of your cleaning process.
Removing furniture and objects from the room allows you to have unobstructed access to the entire floor, ensuring that no area is left untouched. This is particularly important when dealing with stubborn stains or ground-in dirt particles, as you want to be able to clean every inch of the vinyl surface.
By clearing the room, you also minimize the risk of potential damage to your furniture or objects. Cleaning solutions, hot water, or even the pressure of a soft-bristled brush can potentially cause harm to delicate items. Moreover, moving furniture around as you clean can result in scratches or other surface damages to your valuable possessions.
Gather Supplies
To effectively clean vinyl flooring and remove ground-in dirt, proper supplies are essential. Here is a list of items you’ll need:
1. Dawn liquid: Dawn is a gentle yet powerful cleaner that can effectively lift dirt and stains without damaging the vinyl surface.
2. Hot water: Warm water helps to loosen dirt particles and make them easier to remove.
3. Apple cider vinegar: Vinegar is a natural cleaner that can help break down stubborn stains and disinfect the floor.
4. Mop: A microfiber or sponge mop is ideal for cleaning vinyl flooring, as it effectively traps dirt and debris.
5. Broom: Before you start mopping, use a broom to sweep away any loose dirt and dust particles. This will prevent the dirt from being spread around while mopping.
6. Old towels: Keep a few old towels handy to wipe up excess moisture and to protect the floor from scratches as you move furniture or objects around.
7. Wax-free floor polish or sealer: Once the floor is clean, using a wax-free floor polish or sealer can help protect the vinyl surface from future stains and dirt.
By gathering these supplies, you can ensure that your vinyl flooring remains clean, free from ground-in dirt, and properly maintained.
Getting Ground In Dirt Out of Vinyl Flooring
Vinyl flooring is a popular choice for many homeowners due to its durability and easy maintenance. However, over time, dirt and grime can become ground into the surface, making it difficult to remove. Thankfully, there are effective methods to tackle ground-in dirt and restore the cleanliness and beauty of your vinyl flooring. In this article, we will discuss some tried and true techniques to get ground-in dirt out of vinyl flooring.
By following these steps and using the right tools and cleaning solutions, you can effectively remove stubborn stains and dirt particles, leaving your vinyl floor looking as good as new. So, let’s dive in and discover the best ways to deep clean your vinyl flooring.
Step 1: Sweep and Vacuum the Floor
Before starting the deep cleaning process for your vinyl flooring, it is essential to properly sweep and vacuum the floor to remove any loose dirt and debris. This step ensures that the cleaning solution can effectively penetrate the ground-in dirt and stains.
To begin, use a broom or a soft-bristled brush to sweep the entire floor surface. This will help remove larger particles of dirt, dust, and loose debris. Make sure to sweep in long, even strokes, covering all areas of the floor.
Next, use a vacuum cleaner with a brush attachment to thoroughly clean the vinyl flooring. The brush attachment will help loosen and lift any remaining dirt particles from the floor surface. Vacuum in a back and forth motion, making sure to reach all corners and edges of the floor.
By sweeping and vacuuming the floor before deep cleaning, you ensure that the cleaning solution can work more effectively, as it won’t have to contend with excessive loose dirt. This simple step will help prepare the vinyl flooring for a more thorough and successful cleaning process.
Remember, regular maintenance and cleaning are essential to keep vinyl floors looking their best. Sweeping and vacuuming regularly, along with deep cleaning as needed, will help keep your vinyl flooring in pristine condition.
Step 2: Apply a Cleaning Solution
Once you’ve swept and vacuumed the vinyl floor, it is time to apply a cleaning solution. This will help break down any ground-in dirt and grime, making it easier to remove. To mix the solution, fill a gallon of water with one cup of white vinegar and one tablespoon of liquid dish soap or Dawn liquid. If you have a steam cleaner, use the manufacturer’s recommended cleaning solution.
Once your cleaning solution is ready, pour it onto the floor in sections and spread it evenly with a mop or soft cloth. You can also opt to use a multi-surface floor cleaner which will provide an extra boost of cleaning power to help remove stubborn dirt particles.
To keep your vinyl floor looking its best, it’s important to check the manufacturer’s instructions for any specific cleaning solutions or techniques they recommend.
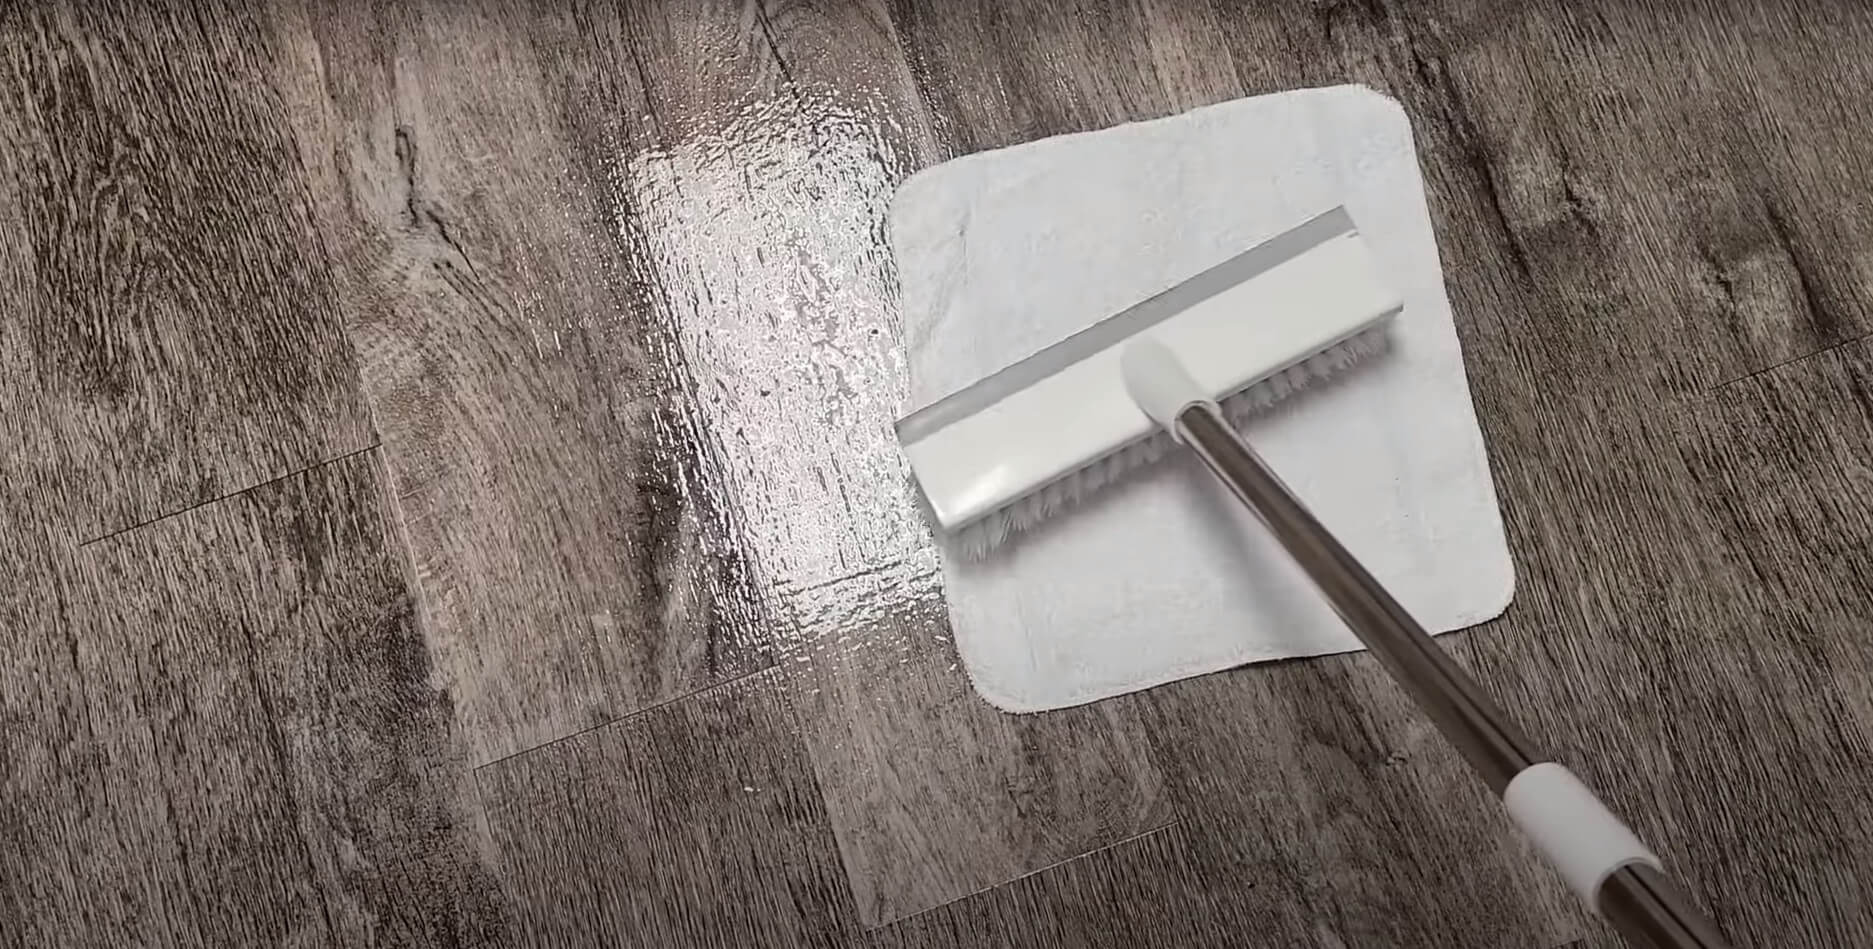
Step 3: Scrub and Mop the Floor
Once the cleaning solution has been applied, use a soft brush to scrub the entire floor surface. This will help loosen up any ground-in dirt and grime. Make sure to scrub in gentle, circular motions, starting from one corner and working your way across the floor.
Once you’ve finished scrubbing, use a clean microfiber mop or soft cloth to mop up the solution. Start from one corner of the room and work your way out in overlapping strokes. This will ensure that no areas are missed.
If you have textured vinyl flooring, make sure to use a soft-brist led brush to scrub the floor before mopping up the cleaning solution. This will help remove any dirt particles that are lodged in the grooves of the texture.
Step 4: Dry and Polish the Floor
Once you’ve mopped up all of the cleaning solution, it’s time to dry and polish the vinyl flooring. To do this, use a clean cloth or paper towel to wipe up any remaining moisture. Make sure to go over the entire floor surface, including any corners or edges that may have been missed.
If necessary, you can also use a steam cleaner or steam mop to help dry the floor more quickly. This is especially useful for tougher stains and ground-in dirt. Alternatively, using a steam iron on the low heat setting can also help dry and polish the floor.
Once the floor is completely dry, use a soft cloth to buff the floor and give it a nice shine. This will help protect the vinyl against future dirt and grime build up and keep the floors looking their best.
Conclusion
Getting ground-in dirt out of vinyl flooring can be a challenging task, but with some patience and elbow grease, you can have your floors looking as good as new! Start by sweeping and vacuuming the floor to remove any loose dirt particles. Then, mix a cleaning solution and apply it to the floor. Use a soft brush to scrub away any ground-in dirt and grime.
Finally, mop up the solution and dry the floor with a cloth or steam cleaner. Once the floors are dry, use a cloth to buff and polish the floor for a nice shine. With regular maintenance and cleaning, you can ensure that your vinyl floors will remain looking beautiful for years to come.