How To Remove Glue Down Wood Floors
Are you tired of your old glue down wood floors and ready for a new look in your home? Removing…
Are you tired of your old glue down wood floors and ready for a new look in your home? Removing them may seem like a daunting task, but with the right tools and techniques, it can be a successful DIY project.
In this article, we will guide you through the process of removing glue down wood floors step by step, so you can achieve the fresh start you’ve been dreaming of.
Before we dive into the nitty-gritty of the removal process, it’s important to note that removing glue down wood floors can be a time-consuming and labor-intensive task. However, with patience and persistence, you can achieve great results.
By following our tips and techniques, you’ll be able to remove your old floors without damaging the subfloor or surrounding areas. So, let’s get started on this exciting journey of transforming your space!
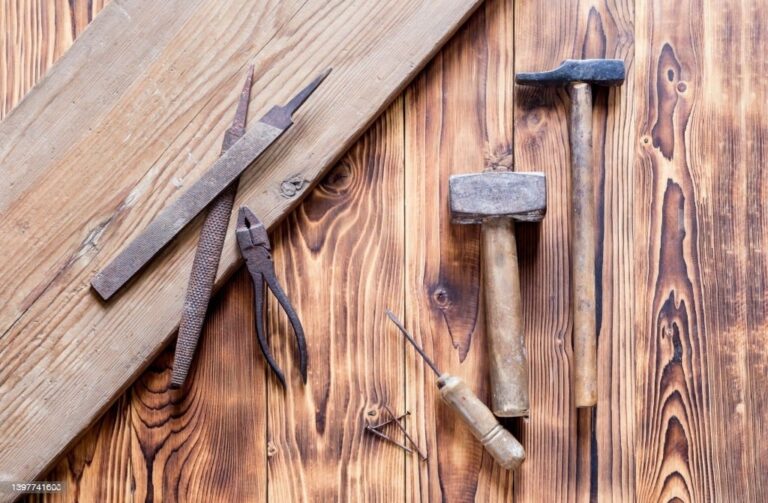
Tools and Materials You’ll Need
You’ll wanna grab your toolbox and gather some essential supplies before getting started on this project. Firstly, you’ll need to wear protective gear such as gloves, safety glasses, and a dust mask. This will protect you from any potential hazards that may arise during the removal process.
Additionally, you’ll need a pry bar, putty knife, hammer, utility knife, and a floor scraper to remove the glue down wood floors. To protect your subfloor from damage, you’ll also need a floor protection material such as rosin paper or plastic sheeting. This will prevent any scratches or dents on the subfloor while you’re removing the glue down wood floors.
For the disposal of the removed wood flooring and adhesive, you’ll need a heavy-duty garbage bag, a dumpster, or a local recycling center. Make sure to check with your local authority for proper disposal options.
It’s important to have all the necessary tools and materials to ensure a smooth and safe glue down wood floor removal process. Proper preparation will not only make the job easier but also prevent any injuries or damages to your property.
So, gather your supplies and let’s get started on removing those old glue down wood floors!
Preparing the Floor for Removal
Before starting the process of extracting the flooring, it’s crucial to adequately prepare the surface. Start by ensuring that the floor is protected to avoid any damage that may occur during the removal process. You can use a thick layer of cardboard or a plastic sheet to cover the surface. This will not only protect the floor but also make the cleanup process much easier.
Next, clear any debris from the area to provide a clear workspace. This includes removing any furniture, rugs, or other items that may be on or around the floor.
Additionally, ensure that the area is well-ventilated to avoid inhaling any harmful chemicals that may be used during the removal process. Open windows and doors and consider using fans or an air purifier to improve air circulation.
Finally, consider the disposal options for the removed flooring. Most flooring materials can be recycled or disposed of at a nearby landfill. However, if you’re unsure of how to dispose of the materials, contact your local waste management facility for guidance. Proper disposal is essential to avoid any environmental hazards and to comply with local regulations.
By taking these steps, you can ensure that the floor removal process is safe, efficient, and successful.
Using Heat and Solvents for Glue Removal
Get ready to witness the magic of using heat and solvents to effortlessly strip away the stubborn adhesive holding your old flooring in place.
Heat application is a popular method for removing glue down wood floors. The heat softens the adhesive, making it easier to scrape off. You can use a heat gun or a hair dryer to apply heat to the glue. Be careful not to hold the heat source too close to the wood, as it can cause damage.
Chemical solvents are another effective way to remove glue down wood floors. These solvents break down the adhesive, making it easier to scrape off. However, you must be careful when using solvents, as they can be harmful to your health. Always wear protective gloves and a mask when working with chemical solvents. Also, make sure to follow the manufacturer’s instructions carefully.
When using heat or solvents, it’s important to work in small sections and avoid rushing the process. Take your time and be patient. Use a scraper to remove the softened adhesive and wipe the surface clean with a rag. Repeat the process until all the glue is removed.
With the right tools and techniques, you can remove glue down wood floors with ease.
Scraping and Sanding Techniques
Now it’s time to use your scraper and sandpaper to smooth out any remaining bumps or rough spots on the surface, creating a seamless and polished look.
Before beginning this process, it’s important to take some dust control and safety precautions. First, cover any nearby furniture or belongings with plastic sheets to protect them from dust and debris. Second, wear a respirator mask to avoid inhaling any dust particles that may be released during the scraping and sanding process.
Begin by using a floor scraper to remove any remaining adhesive residue. Hold the scraper at a slight angle and apply steady pressure to the floor, scraping in the direction of the wood grain. Be sure to remove all traces of adhesive, as any remaining glue can cause problems with the installation of your new flooring.
Once you’ve scraped away as much as possible, use a sanding machine with a coarse grit sandpaper to smooth out any remaining bumps or rough spots.
After you’ve sanded the entire area with coarse grit sandpaper, switch to a finer grit sandpaper to create a smoother surface. Depending on the condition of your floor, you may need to repeat this process several times with increasingly finer grit sandpaper until you achieve the desired level of smoothness.
Remember to take breaks and clean up any dust or debris as you go to ensure a safe and effective process. With patience and persistence, your floor will be ready for its new installation in no time.
Tips for a Successful DIY Removal Process
To ensure a successful DIY floor removal process, you’ll want to prepare your space by covering nearby furniture and wearing a respirator mask before starting to scrape and sand the surface to a seamless finish.
However, there are a few more tips that can help make the process smoother and more efficient. Here are some additional things to keep in mind:
- Use a heat gun to soften the adhesive before scraping. This can make the process easier and less time-consuming.
- Consider renting a floor scraper machine to save time and energy. These machines are designed specifically for the task and can make the job much easier.
- Be patient and take breaks as needed.
Removing glued-down wood floors can be a challenging and physically demanding task, so it’s important to take care of yourself and avoid overexertion.
Overall, with the right preparation, tools, and mindset, removing glued-down wood floors can be a successful DIY project. By following these tips and taking the necessary safety precautions, you can achieve a smooth and seamless finish that will prepare the space for your next flooring project.
Conclusion
Overall, removing glue down wood floors can be a challenging task, but with the right tools, materials, and techniques, it’s possible to do it yourself.
Preparing the floor by removing any obstacles, cleaning the surface, and creating a safe work environment is essential for a successful removal process.
Using heat and solvents in combination with scraping and sanding techniques can help break down the adhesive and remove the flooring. It’s important to wear protective gear and take breaks as needed during the process.
If you’re not comfortable with the process, it’s always best to seek professional help to ensure a safe and efficient removal. However, with patience and perseverance, removing glue down wood floors can be accomplished and pave the way for a new flooring installation.
Remember to take your time, follow the necessary precautions, and seek guidance if needed. Happy DIY-ing!