How To Install Wood Flooring
Installing wood flooring can seem like a daunting task, but with the right tools and a little bit of know-how,…
Installing wood flooring can seem like a daunting task, but with the right tools and a little bit of know-how, it’s a project that can be accomplished by any DIY enthusiast.
In this article, we’ll take you through the process step-by-step, from measuring and preparing your space to finishing and maintaining your newly installed floors.
First, we’ll discuss how to measure and prepare your space for installation. This includes measuring the length and width of the room, as well as any angles or alcoves that may require special attention.
We’ll also cover how to choose the right type of wood flooring for your needs, and how to prepare your subfloor to ensure a smooth and level surface for installation.
With these steps completed, you’ll be ready to lay down your wood flooring and start enjoying the beauty and durability of your new floors.
Measuring and Preparing Your Space
Before ya start gettin’ all fancy with the new stuff, ya gotta make sure ya measure and prepare the space just right.
The first thing ya need to do is calculate the amount of materials needed. This includes not only the wood planks, but also any underlayment, adhesive, and trim pieces. It’s always a good idea to buy a little extra, just in case.
Next up is leveling the subfloor. This is a crucial step to ensure that the wood planks lay flat and don’t squeak or buckle over time.
Start by checking for any high or low spots in the subfloor. If there are any low spots, you’ll need to fill them in with a self-leveling compound. If there are high spots, you’ll need to sand them down. Be sure to let the compound dry fully before proceeding.
Once ya have the subfloor leveled, it’s time to lay down the underlayment and start installing the wood planks.
Taking the time to measure and prepare the space properly will ensure a smooth installation process and a beautiful end result. So, grab your tape measure and level, and get to work!
Choosing the Right Type of Wood Flooring
When deciding which type of hardwood to go with, it’s important to take into consideration factors such as durability, style, and cost.
Wood species selection is a crucial part of this decision-making process. Different types of wood have different levels of durability and hardness, which can impact the longevity of your flooring.
Some popular wood species for flooring include oak, maple, and cherry. Oak is known for its durability and affordability, while maple is a harder wood that is more resistant to scratches and dents. Cherry, on the other hand, is a softer wood that gives off a warm and inviting aesthetic.
Another important consideration when choosing wood flooring is cost. Hardwood flooring can be expensive, and the cost can vary depending on the type of wood and the quality of the product. In addition to the cost of the wood itself, there are also installation costs to consider.
If you’re on a budget, you may want to consider engineered wood flooring, which is made up of layers of wood and is typically less expensive than solid hardwood flooring. It’s important to do your research and find a flooring option that fits within your budget.
When choosing the right type of hardwood flooring, it’s important to consider both the practical and aesthetic aspects. You want a flooring option that is durable and long-lasting, but also complements the style and design of your space.
By taking into account factors such as wood species selection and cost considerations, you can find a wood flooring option that is perfect for your home.
Preparing Your Subfloor
Preparing your subfloor is an essential step in ensuring the longevity and stability of your new hardwood floors, as it serves as the foundation for the finished product. Before installation, it’s crucial to conduct moisture testing on your subfloor to ensure it’s dry and free from moisture. A moisture meter can be used to test the moisture level of your subfloor.
Ideally, the moisture content should be between 6% and 9%. Leveling techniques can also be used to ensure a flat and even subfloor. If there are any high spots or low spots on the subfloor, they can cause unevenness on your finished flooring. Self-leveling compounds can be used to level out any low spots, while sanding or grinding can be used to level out any high spots.
It’s important to ensure that the subfloor is level before proceeding with the installation to avoid any potential problems. Furthermore, it’s important to ensure that your subfloor is clean and free from any debris, such as dust or dirt. Any debris left on the subfloor can cause unevenness, which can affect the finished product.
Vacuuming or sweeping the subfloor thoroughly before installation can help to remove any debris. With a properly prepared subfloor, you can ensure that your hardwood floors will be stable and long-lasting.
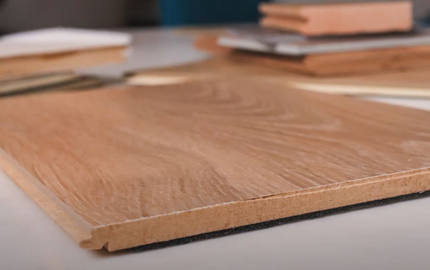
Laying Down Your Wood Flooring
Now it’s time to put down your beautiful new hardwood floors, creating a stunning and durable foundation for your home’s interior design.
Before you begin, make sure you have all the necessary tools needed for this step. You’ll need a rubber mallet, a saw, a measuring tape, a straight edge, and a jigsaw. It’s important to have all these tools on hand to ensure a smooth and efficient installation process.
One of the most common mistakes that people make when laying down their hardwood flooring is not properly staggering the planks. You want to avoid having seams line up, as this can weaken the structural integrity of the flooring. Instead, stagger the planks so that each row is offset from the previous row by about one third of the length of the plank.
Another important thing to keep in mind is to leave a small gap between the flooring and the wall. This will allow for any expansion and contraction of the wood due to changes in temperature and humidity. Generally, you’ll want to leave about a quarter inch gap, which can be covered up later with baseboards or quarter round molding.
With these tips in mind, you’re ready to start laying down your hardwood flooring. Remember to take your time, measure carefully, and double-check your work as you go along. By the time you’re finished, you’ll have a beautiful and sturdy new floor that you can be proud of.
Finishing and Maintaining Your Wood Flooring
Maintaining your new hardwood floors is crucial to keeping them looking their best, and luckily, it’s not too difficult for you to do! Here are some tips to help you finish and maintain your wood flooring:
-
Choose the right finish: There are many different types of finishes you can use on your wood flooring, including oil-based, water-based, and wax. Each type of finish has its own pros and cons, so it’s important to do your research and choose the one that’s right for your needs.
-
Prevent scratches and damage: Although hardwood floors are durable, they can still be prone to scratches and other types of damage. To prevent this, be sure to place felt pads on the bottom of furniture legs, use area rugs in high-traffic areas, and avoid wearing shoes with sharp heels on your floors. You should also clean up spills and stains immediately, as they can cause discoloration and other types of damage over time.
-
Clean your floors regularly: Regular cleaning is essential for maintaining the beauty and longevity of your hardwood floors. Use a soft-bristled broom or vacuum to remove dirt and debris, and mop your floors with a damp microfiber mop as needed. Avoid using harsh chemicals or abrasive cleaning tools, as these can damage the finish on your floors.
-
Schedule professional maintenance: In addition to regular cleaning, it’s a good idea to schedule professional maintenance for your hardwood floors every so often. This may include deep cleaning, buffing, or recoating the finish. A professional can help you assess the condition of your floors and recommend the best course of action to keep them looking their best for years to come.
Conclusion
So that’s it! This is how we installed our wood flooring and we couldn’t be happier with the results.
We took our time measuring and preparing the space, choosing the right type of wood flooring, and preparing the subfloor to ensure a smooth and successful installation.
Laying down the flooring was a bit of a challenge, but with patience and attention to detail, we were able to achieve a beautiful finished product.
Now that our wood flooring is installed, we plan to take good care of it by regularly cleaning and maintaining it. We know that with proper care, our flooring will last for many years to come and continue to add warmth and beauty to our home.
We hope that this guide has been helpful to you and that you feel confident in your ability to install your own wood flooring.
Good luck and happy renovating!