How To Remove Linoleum
Removing linoleum can seem like a daunting task, but with the right tools and techniques, it can be done efficiently…
Removing linoleum can seem like a daunting task, but with the right tools and techniques, it can be done efficiently and effectively. Whether you’re renovating your home or simply updating your flooring, taking on the job of removing linoleum can save you money and give you the satisfaction of a DIY project.
Before diving into the removal process, it’s important to assess the condition of your linoleum and prepare your work area for a successful removal.
With a little bit of elbow grease and some careful planning, you can remove your linoleum and have a clean slate for your new flooring.
In this article, we’ll guide you through the process of removing linoleum step-by-step, so you can tackle the job with confidence.
Assessing the Condition of Your Linoleum
Take a look at your linoleum and check if it’s in good enough shape to keep or if it’s time to say goodbye.
Assessing the condition of your linoleum is the first step in determining whether you need to repair or replace it. If your linoleum is in good shape, you may be able to simply clean it and make minor repairs to keep it looking great for years to come.
If your linoleum is damaged, however, you’ll need to consider whether it’s worth repairing or if it’s time to replace it. If the damage is minor, such as a few scratches or scuffs, you can probably repair it with a linoleum repair kit.
However, if the damage is more extensive, such as tears or large stains, you may need to replace the entire floor.
When assessing the condition of your linoleum, it’s important to consider not only the visible damage but also the overall wear and tear. If your linoleum is old and worn, even if there’s no visible damage, it may be time to replace it.
Ultimately, the decision to repair or replace your linoleum will depend on the condition of your floor and your budget.
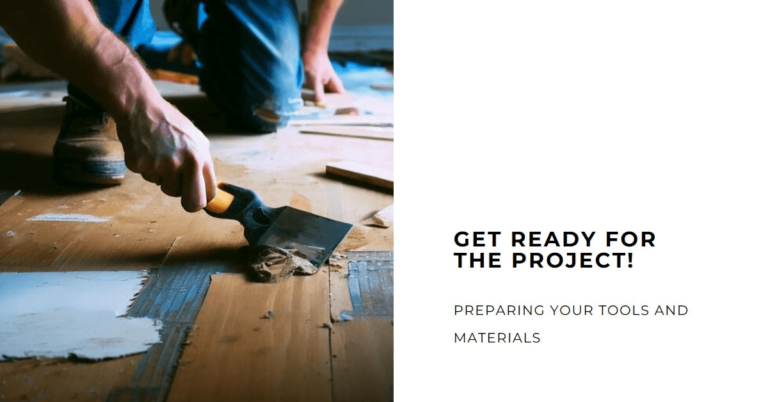
Preparing Your Work Area
Before you start removing your linoleum, it’s important to prepare your work area first.
Clearing obstacles and furniture will give you more room to work. Take the time to move any chairs, tables, or appliances out of the way. This will ensure that you have a clear path to work on the floor.
To avoid any accidental damage to your furniture or floors, cover them with plastic or drop cloths. This is especially important if you’re using any chemicals or tools that may cause damage or staining. Make sure to cover all nearby furniture and any other items that could be affected.
When preparing your work area, don’t forget to wear protective gear. This may include gloves, goggles, and a dust mask. These items will help protect you from any potential hazards, such as dust or chemicals. Make sure to wear them throughout the entire process, especially if you’re using any chemicals or power tools.
By taking the time to prepare your work area, you’ll be able to work more efficiently and safely. Clearing obstacles and covering furniture will give you more room to work, while wearing protective gear will help prevent any potential hazards. With a well-prepared work area, you’ll be ready to start removing your linoleum.
Choosing the Right Method for Removal
You’ll need to consider which method is best suited for your floor based on factors like age and condition, as well as your own skill level and available tools. There are three main methods for removing linoleum: using a heat gun, using a chemical solvent, and using a scraper. Each method has its own advantages and disadvantages, so it’s important to choose the one that’s right for you.
Using a heat gun is often the quickest and easiest method for removing linoleum. This method involves using a heat gun to soften the adhesive that holds the linoleum in place, making it easier to scrape off. However, using a heat gun can be dangerous and requires proper safety precautions, including wearing gloves and eye protection. Additionally, this method may not be suitable for older linoleum floors, as the heat can cause the linoleum to crack or become brittle.
Using a chemical solvent is another option for removing linoleum. This method involves applying a solvent to the linoleum to dissolve the adhesive. While this method may be less dangerous than using a heat gun, it can be messy and time-consuming. Additionally, some solvents may not be suitable for all types of linoleum, so it’s important to choose the right product for your floor.
| Method | Advantages | Disadvantages |
|---|---|---|
| Heat Gun | Quick, easy | Dangerous, may not be suitable for older linoleum |
| Chemical Solvent | Less dangerous, effective on some linoleum | Messy, time-consuming, may not be suitable for all types of linoleum |
| Scraper | Cost-effective, environmentally friendly | Labor-intensive, may damage subfloor |
In conclusion, choosing the right method for removing linoleum is crucial for achieving the best results. Whether you choose to use a heat gun, a chemical solvent, or a scraper, it’s important to take the necessary safety precautions and to carefully consider the age and condition of your floor. With the right tools and techniques, you can successfully remove linoleum and prepare your floor for a new finish.
Step-by-Step Guide to Removing Linoleum
If you’re looking to update your flooring, this step-by-step guide can help you successfully strip away the old linoleum.
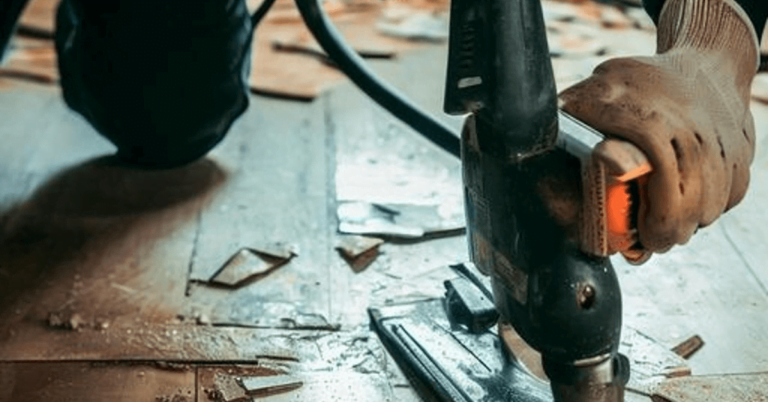
There are several methods to choose from when it comes to removing linoleum, but we’ll be focusing on the heat gun method. This method is effective and efficient, but it does require some patience and caution.
First, gather all the necessary tools, including a heat gun, a scraper, gloves, and safety goggles.
Turn on the heat gun and hold it a few inches above the linoleum. Move the heat gun around in a circular motion to soften the adhesive underneath.
As the adhesive softens, use the scraper to lift up the linoleum. Work in small sections to avoid burning the linoleum or damaging the subfloor.
If using solvents is more your style, you can also try that approach. However, be aware that solvents can be messy and potentially hazardous.
Apply the solvent to the linoleum and let it sit for the recommended amount of time. Then, use a scraper to lift up the linoleum. Be sure to wear gloves and work in a well-ventilated area.
Once you’ve removed all the linoleum, clean the subfloor thoroughly before installing your new flooring.
With patience and the right tools, removing linoleum can be a successful DIY project.
Cleaning Up and Preparing for New Flooring
Now that the old linoleum flooring’s removed, it’s time to focus on cleaning up the subfloor and preparing it for new flooring.
Start by using a putty knife or scraper to remove any remaining adhesive or debris from the surface. Next, sweep the subfloor thoroughly and vacuum any remaining dust or debris. It’s important to ensure that the surface is completely clean and smooth before installing new flooring.
Before moving on, it’s important to properly dispose of the old linoleum flooring. While some areas may have specific disposal guidelines, in general, linoleum can be disposed of in a landfill. However, it’s important to check with your local waste management facility to ensure that you are following proper disposal guidelines.
If you are unsure about how to dispose of your linoleum, consider hiring a professional waste removal company to handle the disposal for you.
Now that the subfloor is clean and the old flooring has been disposed of properly, it’s time to prepare for your new flooring installation.
Depending on the type of flooring you choose, you may need to add an underlayment or moisture barrier to the subfloor. It’s important to carefully follow the instructions for your new flooring to ensure that it is installed correctly and will last for years to come.
With a clean and properly prepared subfloor, you can be confident that your new flooring will look great and function well for years to come.
Conclusion
Well, that’s it! We’ve successfully removed our linoleum flooring and we’re now ready to move on to our new flooring.
It was a bit of a process, but with the right tools and techniques, it can be done smoothly and efficiently.
Remember, the key is to assess the condition of your linoleum, prepare your work area, choose the right method for removal, and follow the step-by-step guide we’ve provided.
Don’t forget to clean up thoroughly and prepare for your new flooring installation. With these tips and tricks, you’ll be able to remove your linoleum with ease and have a beautiful new floor in no time!